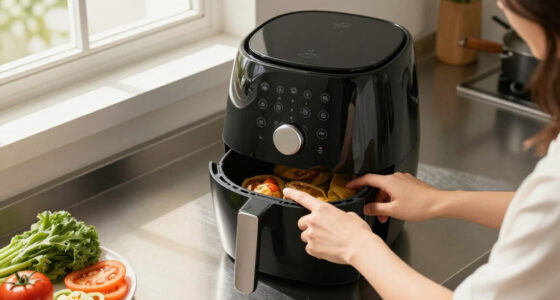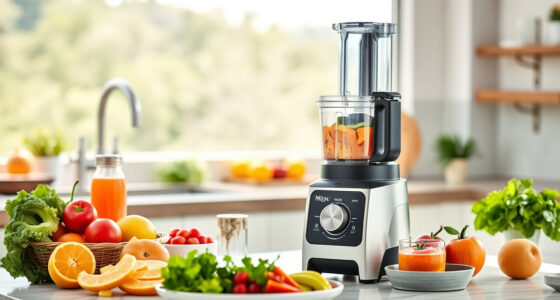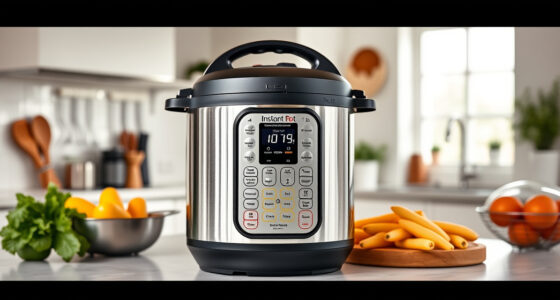
Set up a smart kitchen gadget by checking its compatibility, connecting it to your home Wi-Fi and app, and testing its main function. This guide is for beginners setting up a connected appliance such as a smart plug, food scale, thermometer, coffee maker, or countertop cooker. Allow 30–60 minutes for one gadget; setup time varies by device and network.

Get kitchen gear delivered free with Prime
- Fast, free delivery on millions of items
- Prime Video, Amazon Music and more included
- Member-only deals all year
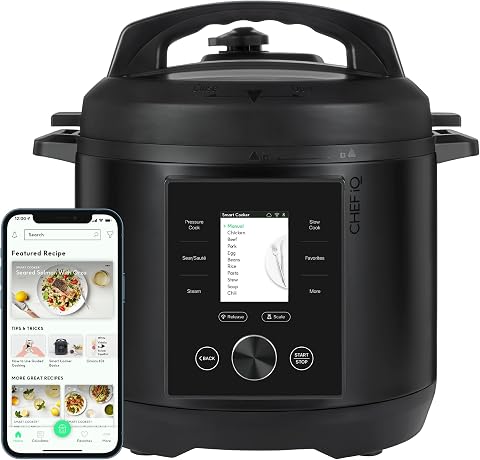
CHEF iQ Smart Pressure Cooker with WiFi and Built-In Scale, 6 Quart
- ✔ Capacity: 6 quarts
- ✔ Dimensions: 13 x 13 x 13 inches
- ✔ Weight: 10.4 pounds

Etekcity Food Kitchen Scale with Nutritional Calculator, Smart App, 11lb
- ✔ Capacity: 5,000 g / 11 lb
- ✔ Measurement range: 3 g to 5,000 g
- ✔ Increment: 1 g
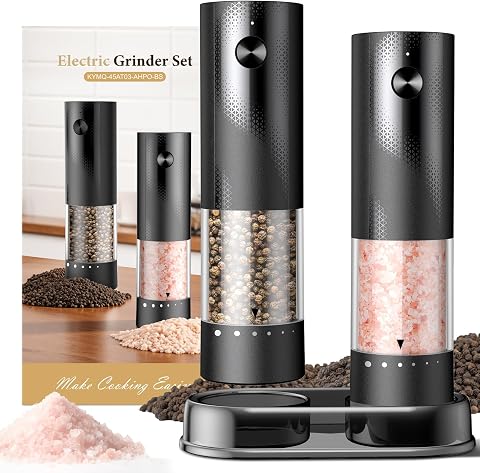
Electric Salt and Pepper Grinder Set – Rechargeable Automatic Salt and Pepper Shakers, 2 Pack
- ✔ Set: Two grinders
- ✔ Hopper capacity: 100 ml each
- ✔ Coarseness: Six external settings
Difficulty: Beginner | Time: 30–60 minutes for one gadget
What You’ll Need
Tools & Materials:
- Smart kitchen gadget and included power adapter or accessories
- Phone or tablet with the manufacturer’s app installed
- Home Wi-Fi name and password
- A clear, dry counter space near a suitable outlet
Knowledge:
- Basic phone settings and app installation
- How to find your home Wi-Fi network and enter its password
Read the device’s safety and setup instructions before plugging it in. Check that the gadget supports your Wi-Fi band and phone operating system. Many devices require a 2.4 GHz Wi-Fi network. Keep food-contact parts clean, and do not place appliances near water or heat unless the manufacturer says they are designed for that location.
CHEF iQ Smart Pressure Cooker with WiFi and Built-In Scale, 6 Quart
The CHEF iQ earns the top spot because its connected features support a full cooking task, rather than adding a digital extra to a single utensil. The built-in scale measures ingredients and can indicate the required liquid amount, while the app offers guided recipes, videos, ingredient presets and remote monitoring. That combination can help us move from choosing a meal to preparing it with fewer separate measurements and less guesswork.Its advantage over the Etekcity scale is integration: Etekcity is the more targeted tool for weighing food and tracking nutrients, but it does not cook the meal. CHEF iQ also has a broader role than the electric grinders, which automate seasoning but leave the main cooking process to us. Three release methods—quick, pulse and natural—give the cooker more flexibility at the end of pressure cooking.That breadth comes with real constraints. Connected cooking and wireless updates depend on the app, which may frustrate buyers who prefer appliance controls without a phone. The stated 120V supply and recommendation against use outside the United States and Canada also make it a poor fit for many international kitchens. At 13 inches in each dimension, it needs dedicated counter or cabinet space. We would choose it when guided multicooking is the goal, not simply because it has WiFi.
Pros:
- Built-in scale measures ingredients and can indicate the amount of liquid needed.
- App includes guided recipes, videos, ingredient presets and remote monitoring.
- Quick, pulse and natural pressure-release methods support different cooking needs.
- Steamer rack and basket are included for additional cooking setups.
Cons:
- Wireless updates and connected cooking features require the app.
- Use outside the United States and Canada is not recommended.
- Its 13-inch dimensions and 10.4-pound weight require storage and counter space.
Best for: Home cooks who want one connected appliance for guided pressure cooking, ingredient weighing and remote monitoring.
Not ideal for: Buyers outside the United States or Canada, people avoiding app-dependent cooking, or kitchens without room for a 6-quart cooker.
Bottom line: We rank CHEF iQ first for bringing measurement, recipe guidance and pressure cooking into one connected appliance, provided its app and regional limits suit our kitchen.
“We rank CHEF iQ first for bringing measurement, recipe guidance and pressure cooking into one connected appliance, provided its app and regional limits suit our kitchen.”
Etekcity Food Kitchen Scale with Nutritional Calculator, Smart App, 11lb
When our priority is knowing what goes into a meal, Etekcity’s nutrition scale is the most focused option here. It weighs foods from 3 grams to 5,000 grams in 1-gram increments and connects with the VeSync app to log up to 19 nutrients. The stated Nutritionix database contains about one million food items, and custom food data can be added. This gives the scale a job the CHEF iQ cooker is not designed to do: help us record intake and review daily, weekly or monthly nutrition patterns.The 304 stainless steel platform is slim and straightforward to clean, while tare and multiple unit options make it useful for ordinary recipes as well as portion tracking. Unlike the cooker, Etekcity takes little space and does not ask us to commit to a large appliance. Compared with the grinders, it provides a more substantial digital record, though it requires more app interaction and accurate food selection to make that record useful.There are limits to its smart side. Nutrition results depend on matching the food and serving information correctly, and barcode scanning is currently available only in the US. The scale can display 12 nutrition facts, while the app handles the broader set of 19 data points, so buyers should expect to use a phone for deeper tracking. We recommend it for people who will actively log food; cooks who only need occasional weight measurements may not benefit from the added app layer.
Pros:
- Tracks up to 19 nutrition data points through the VeSync app.
- Nutritionix database and custom food entries support a broad range of foods.
- 1-gram increments and tare function suit portioning and recipe work.
- Food-grade 304 stainless steel platform is designed for easy cleaning.
Cons:
- Barcode scanning is currently available only in the US.
- Detailed nutrition tracking requires selecting and logging foods in the app.
- The scale’s smart functions add little for buyers who only need occasional weighing.
Best for: People who routinely weigh portions and want app-based calorie, nutrient and trend tracking alongside everyday recipe measurements.
Not ideal for: Cooks who only want a basic weighing scale, buyers outside the US who depend on barcode scanning, or anyone unwilling to log foods in an app.
Bottom line: We recommend Etekcity over the other picks when nutrition records matter more than guided cooking or automated seasoning.
“We recommend Etekcity over the other picks when nutrition records matter more than guided cooking or automated seasoning.”
Electric Salt and Pepper Grinder Set – Rechargeable Automatic Salt and Pepper Shakers, 2 Pack
This rechargeable pair is the simplest smart kitchen gadget in our lineup: press for automatic one-handed grinding, choose from six external coarseness settings and use the built-in LED to see where seasoning lands. That can be handy when one hand is holding a pan or serving spoon. Its wide opening and stated 100 ml hopper also reduce the frequency and mess of refilling compared with a small, narrow grinder.Its role is intentionally narrower than the other picks. The CHEF iQ cooker guides a meal and the Etekcity scale supports measurement and nutrition records; these grinders automate a repeated finishing task. The ceramic grinding core is described as preserving spice flavor, and external adjustment lets us change coarseness without handling the outlet. A rechargeable design also avoids disposable batteries, though the supplied description does not specify a charging connector.We should choose this set for convenience at the stove or table, not for broader kitchen intelligence. It has no app, recipe guidance or food tracking, so it ranks below the scale and cooker on connected assistance. Charging becomes another small maintenance task, and the plastic construction may feel less substantial than the Etekcity’s steel platform. The included cleaning brush signals that spice residue can need attention. If we season by hand already and value direct control over automation, a manual grinder may be a better match.
Pros:
- Automatic operation supports one-handed seasoning.
- Six external grind settings allow coarseness changes without touching the outlet.
- Rechargeable design avoids disposable batteries.
- Wide-opening 100 ml hoppers and included cleaning brush support filling and upkeep.
Cons:
- Smart functionality is limited to automated grinding and an LED light.
- Requires charging, and the charging connector is not specified in the supplied details.
- Plastic construction may feel less substantial than the stainless steel Etekcity scale.
Best for: Cooks who want hands-free, one-handed salt and pepper grinding with adjustable coarseness during meal preparation or serving.
Not ideal for: Buyers seeking app connectivity, recipe guidance, nutrition tracking, or a low-maintenance manual grinder.
Bottom line: We would pick these grinders for convenient seasoning, while choosing Etekcity or CHEF iQ when we want smart features to guide a broader food task.
“We would pick these grinders for convenient seasoning, while choosing Etekcity or CHEF iQ when we want smart features to guide a broader food task.”
As an Amazon Associate we earn from qualifying purchases.
Before You Start
Check the connection requirements before opening setup. Find the device’s model number and confirm that its app is available for your phone. If the instructions specify 2.4 GHz Wi-Fi, check your router or ask the person who manages it how to connect to that band. Some routers combine bands under one network name; the app may handle this automatically, or setup may require temporarily separating the bands.
Choose a location with a stable Wi-Fi signal and a suitable outlet. Keep cords away from hot surfaces, sinks, and walkways. If the device handles food, wash or dry its removable parts as directed before use. Do not use an appliance with a damaged cord, cracked housing, or missing safety parts.
Step-by-Step Instructions
Step 1: Choose the gadget’s job and location
Decide what kitchen task the gadget will handle, then choose a location that fits its instructions. Place it within reach of its outlet and Wi-Fi signal, with enough room for ventilation, opening lids, and handling food or drinks. Keep it clear of the sink, stove, and busy prep areas unless the manufacturer approves that placement.
Tip:For a smart plug, check the connected appliance’s power rating and the plug’s maximum load before use. Do not connect a high-power appliance unless both manufacturers permit it.
Check: The gadget sits level, has the required clearance, and can reach its outlet without a cord crossing a sink, hot surface, or walkway.
Step 2: Check the app and device requirements
Read the setup label or manual and note the model number, app name, Wi-Fi band, Bluetooth requirement, and any account needed. Install the official app from your phone’s app store. Check that your phone is connected to the home network you plan to use, then grant only the permissions the app needs to discover or control the gadget.
Tip:Use the app named by the manufacturer. Search results may include unrelated apps with similar names.
Check: The app opens, the phone is on the intended Wi-Fi network, and you know whether setup needs Bluetooth or a particular Wi-Fi band.
Step 3: Prepare the appliance and its accessories
Unpack the gadget and compare the parts with the included list. Remove shipping inserts, protective film, and ties. Wash food-contact accessories only as directed; dry them fully before assembly. Fit removable parts in the order shown in the manual. Leave the gadget unplugged while assembling it unless its instructions say otherwise.
Tip:Do not immerse the main unit or wash an accessory in a dishwasher unless its care instructions allow it.
Check: All listed parts are present, the appliance is assembled as shown, and no protective material blocks vents, sensors, or moving parts.
Step 4: Power on and add the gadget in the app
Place the gadget at its selected location and plug it into a suitable outlet. Turn it on using its power button or the method in the manual. Open the app, sign in or create an account if required, and choose its option to add or set up a new device. Select the correct model when prompted.
Tip:If the gadget has a setup or pairing button, press it only for the length specified. A long press may reset a device that is already configured.
Check: The gadget shows a pairing signal, such as a blinking status light or on-screen prompt, and the app begins searching for it.
Step 5: Connect the gadget to Wi-Fi
Follow the app prompts to select your home network and enter its password. Keep the phone near the gadget while it pairs. If the app asks for Bluetooth or local network access, allow the requested access during setup. Wait for the app to confirm the connection before closing it or unplugging the device.
Tip:Enter the Wi-Fi password carefully, including capitalization. If setup fails on a combined-band network, follow the manufacturer’s instructions for selecting 2.4 GHz; do not change router settings unless you have permission to manage the network.
Check: The app shows the device as connected or online, and its status light changes to the normal connected state described in the manual.
Step 6: Set basic preferences and safety limits
Give the gadget a clear name, such as “Kitchen scale” or “Coffee maker.” Set only the preferences you need, such as measurement units, time zone, temperature scale, or notification choices. Review schedules and remote-control settings. For appliances that heat, grind, or move, keep safety locks and automatic shutoff features enabled when available.
Tip:Skip voice assistant linking and routines for now if you do not need them. You can add them later after the basic connection works.
Check: The app displays the correct device name and useful settings, and any safety features shown in the app remain enabled.
Step 7: Test the main kitchen function
Run a small, low-risk test using the instructions for your gadget. For a scale, weigh a known item. For a thermometer, check a food-safe temperature reading as directed. For a smart plug, switch a low-power lamp on and off. For a coffee maker or cooker, use its recommended first-use procedure and the specified amount of water or ingredients. Watch the appliance throughout the test.
Tip:Do not test heating or cooking appliances empty unless the manufacturer explicitly permits it. Keep hands away from hot surfaces and moving parts.
Check: The gadget performs its intended function, and the app displays the same status or measurement as the device. No error light, unusual smell, leak, or unexpected movement appears.
Step 8: Check remote control and notifications
With the gadget in a safe state, use the app’s main control once. Confirm that the device responds, then check whether the app reports the updated status. If you enabled alerts, trigger or wait for a routine notification only when you can do so safely. Close the app and reopen it to check that the device remains listed.
Tip:Do not start a cooker, kettle, or other heating appliance remotely unless its instructions allow remote operation and you can monitor it.
Check: The app reconnects to the gadget and shows its current state. Any enabled alert arrives as expected without the device starting an unsafe operation.
Common Mistakes to Avoid
- Trying to pair the gadget on an unsupported Wi-Fi band. — Check the manual’s network requirements first. If it needs 2.4 GHz, follow the router or app instructions for that band.
- Entering the wrong Wi-Fi password or selecting a guest network that blocks devices from communicating. — Verify the network name and password, and use your normal home network unless the manufacturer recommends a guest network.
- Placing the gadget where heat, steam, splashes, or weak Wi-Fi affect it. — Follow the placement guidance, maintain ventilation, and check the signal at the chosen location before relying on app control.
- Starting a remote cooking or heating cycle without checking the appliance’s safety rules. — Read the remote-operation instructions and test basic functions first. Keep automatic shutoff and other safety settings enabled.
Troubleshooting
Problem: The app cannot find the gadget.
Solution: Move your phone close to the gadget, turn on Bluetooth if setup requests it, and confirm the device is in pairing mode. Restart the app and follow the manual’s pairing steps. Avoid holding the reset button unless the instructions call for a reset.
Problem: Wi-Fi pairing stops or reports a password error.
Solution: Re-enter the password and check capitalization. Confirm that the network meets the gadget’s band and security requirements. Move the gadget nearer to the router for setup, then retry.
Problem: The gadget appears offline after setup.
Solution: Check that it has power and that the router is online. Restart the gadget using its normal power procedure, reopen the app, and check the manufacturer’s service status or support instructions if it stays offline.
Problem: The app shows a different reading or state from the gadget.
Solution: Wait briefly for the status to refresh, then reopen the device screen. Check that the correct gadget is selected and that units or calibration settings match the manual. Contact the manufacturer if a reading remains outside its stated tolerance.
What Success Looks Like
The gadget is assembled and placed according to its instructions, appears online in the official app, and completes a safe test of its main function. Its app status or reading matches the device, and no warning indicator, error message, leak, unusual smell, or unsafe behavior appears. You can identify how to disconnect it and where to find the manufacturer’s care and safety instructions.
Next Steps
Use the gadget according to its manual and clean food-contact parts after use. Review app and firmware updates when prompted, and repeat the connection check after changing routers or Wi-Fi passwords. If you add another gadget, set it up separately and test its core function before linking it to routines or voice control. Keep the manual or a digital copy available for maintenance and error codes.
Frequently Asked Questions
Do smart kitchen gadgets need Wi-Fi to work?
It depends on the device. Some basic functions work from the buttons even when Wi-Fi is down, while app control, remote status, or recipes may need an internet connection. Check the manual for offline functions.
Can I connect a smart kitchen gadget to public Wi-Fi?
Often not. Public networks may require a browser sign-in or block communication between devices. Use a trusted home network that meets the gadget’s requirements.
Why does setup ask for Bluetooth or local network access?
The app may use Bluetooth to discover the gadget and local network access to transfer Wi-Fi details or communicate with it. Grant access during setup when the manufacturer’s app requests it for pairing.
Is it safe to control a kitchen appliance remotely?
Only when the appliance is designed for remote operation and its manual allows it. Follow its monitoring and clearance rules, and do not remotely start an appliance if doing so could leave heat, blades, or pressure unattended.