
Use this guide to set up a digital air fryer and cook a first batch of food with its touchscreen or buttons. It is for beginners who have an air fryer with a temperature and time display, including models with preset programs. You will learn which controls to use, how to check food as it cooks, and how to recognize when it is done. Allow about 30-45 minutes, including a short empty run if your manual calls for one.

Get kitchen gear delivered free with Prime
- Fast, free delivery on millions of items
- Prime Video, Amazon Music and more included
- Member-only deals all year

Chefman Air Fryer 6-in-1 XL 14-Quart Multifunctional Airfryer
- ✔ Capacity: 14 quarts
- ✔ Dimensions: 13.2" D x 13.9" W x 14.5" H
- ✔ Weight: 13.2 pounds

Cosori TurboBlaze Air Fryer, 9-in-1, 6 Qt, PFAS-Free Ceramic Coating
- ✔ Model: CAF-DC601-KUS
- ✔ Capacity: 6 quarts / 5.7 liters
- ✔ Dimensions: 14.37" D x 11.81" W x 11.85" H, including handle

Ninja Flip Toaster Oven & Air Fryer, SP151
- ✔ Model: SP151
- ✔ Cooking functions: 8-in-1 countertop oven and air fryer
- ✔ Capacity: Up to 4 lb; six slices of toast; 12" pizza; six chicken breasts
Difficulty: Beginner | Time: 30-45 minutes for setup and a first batch
What You’ll Need
Tools & Materials:
- Digital air fryer and its user manual
- Heat-safe tongs or a spatula
- Food thermometer for meat, poultry, or other foods that require a safe internal temperature
- Dish soap, a soft sponge, and a clean towel
Knowledge:
- Basic kitchen safety around hot appliances
- How to read the food package or recipe cooking instructions
Place the fryer on a stable, level, heat-resistant surface with open space around the vents. Check the manual for clearance, dishwasher guidance, and any required first-use cleaning or empty run. Keep the appliance away from curtains, water, and the edge of the counter.
Chefman Air Fryer 6-in-1 XL 14-Quart Multifunctional Airfryer
Among these three, the Chefman makes the strongest case as an all-purpose countertop cooker. Its 14-quart, door-front interior uses three rack positions, making it more suited to cooking different items in layers than the Cosori’s single 6-quart basket. The included rotisserie spit also gives it a roasting option the other two do not list. For buyers comparing digital displays, its touchscreen is clearly described: setting time and temperature is handled at the appliance rather than through a collection of manual dials.That flexibility comes with a larger, more involved format. At 13.2 pounds and roughly 14 inches in each listed dimension, it needs a dedicated place on the counter and is less convenient to tuck away than the Ninja, which can flip upright after use. Its 90°F to 400°F range also tops out below the Ninja and Cosori’s stated 450°F maximum. Choose Chefman when the rack layout, rotisserie, and multiple cooking functions will see regular use; skip it if a compact basket for quick portions is the priority.
Pros:
- 14-quart capacity with three rack positions for cooking multiple items.
- Touchscreen controls for setting time and temperature.
- Includes rotisserie spit and rotating function.
- Combines air frying with baking, broiling, reheating, and dehydrating.
Cons:
- Its oven-style body can be bulky on a small countertop.
- At 13.2 pounds, it is not especially convenient to move often.
- Its stated 400°F maximum is lower than the 450°F listed for Ninja and Cosori.
Best for: Cooks who want one touchscreen appliance for air frying, baking, broiling, reheating, dehydrating, and rotisserie cooking.
Not ideal for: Small-kitchen buyers who need a compact basket fryer, frequent storage, or a higher stated maximum temperature.
Bottom line: We recommend the Chefman for buyers who will use its touchscreen, racks, and rotisserie to replace several countertop cooking tasks.
“We recommend the Chefman for buyers who will use its touchscreen, racks, and rotisserie to replace several countertop cooking tasks.”
Cosori TurboBlaze Air Fryer, 9-in-1, 6 Qt, PFAS-Free Ceramic Coating
The Cosori suits shoppers who want a basket-first appliance rather than an oven with an air-fry function. Its 6-quart square basket offers a defined cooking area for everyday portions, and its nine modes bring more range than a basic fryer without requiring multiple racks or a rotisserie setup. Compared with the Chefman, it trades the larger interior and oven-style accessories for a simpler basket format; compared with the Ninja, it is less useful for pizza or toast-style jobs but more directly focused on basket cooking.The supplied details emphasize a five-speed fan system, a ceramic coating described as PFAS-free, and quiet operation under 53 dB. Those are useful differentiators for households that care about airflow options, cleanup surface, and noise. Its 90°F to 450°F temperature range matches the Ninja’s listed upper limit and extends beyond Chefman’s. However, the appliance still weighs 13.2 pounds and measures over 14 inches deep including its handle, so “basket-style” does not mean effortless to store. Its single-basket capacity also gives less separation between foods than Chefman’s rack arrangement.
Pros:
- 6-quart square basket provides a dedicated air-frying format.
- Nine cooking modes and five fan speeds offer a range of settings.
- PFAS-free ceramic nonstick coating is a stated material feature.
- Listed to operate below 53 dB, with a 90°F–450°F temperature range.
Cons:
- Single-basket layout is less flexible for separate or layered foods than Chefman’s racks.
- At 13.2 pounds and 14.37 inches deep including the handle, it still takes up substantial space.
- Does not offer the Ninja’s listed pizza-and-toast format or Chefman’s rotisserie.
Best for: Households that mostly air-fry in batches and prefer a multi-mode basket with a ceramic-coated cooking surface.
Not ideal for: Buyers who need a rotisserie, several cooking levels, toaster-oven functions, or a lightweight appliance to stow after every use.
Bottom line: We would choose the Cosori when a dedicated, multi-mode basket matters more than oven-style capacity or flip-up storage.
“We would choose the Cosori when a dedicated, multi-mode basket matters more than oven-style capacity or flip-up storage.”
Ninja Flip Toaster Oven & Air Fryer, SP151
The Ninja is the most distinctive choice when storage is part of the buying decision. This 8-in-1 countertop oven and air fryer flips upright after cooking, with the stated design saving up to half the counter space in its stored position. That makes it more appealing than the Chefman or Cosori for a kitchen where appliances need to clear the work surface between meals. Its oven-style interior also accepts a 12-inch pizza, six slices of toast, or up to four pounds of food, which gives it a different kind of capacity from Cosori’s basket.We should be realistic about the flip feature: the unit still needs room while in use, so it does not solve a tight cooking area. The product description also emphasizes the cooking format and infrared heating rather than specifying the touchscreen details as clearly as Chefman does. Buyers choosing primarily for an explicit touchscreen interface may want to confirm the control layout before purchase. Compared with Chefman, Ninja offers a higher stated maximum temperature and vertical storage, while giving up the Chefman’s listed rotisserie and 14-quart capacity. It is best for households that value oven-like versatility and post-use storage more than a compact footprint during cooking.
Pros:
- Flips upright for storage, with up to 50% counter-space savings stated.
- Eight cooking functions combine toaster-oven and air-frying use.
- Fits a 12-inch pizza, six slices of toast, or up to four pounds of food.
- Listed temperature range reaches 450°F.
Cons:
- Its footprint remains sizable while in use.
- The supplied description gives less detail about the digital display interface than Chefman’s touchscreen listing.
- Does not list the Chefman’s rotisserie or Cosori’s ceramic-coated basket.
Best for: Kitchen users who want an oven-style air fryer for pizza, toast, and family portions, then need it to store upright.
Not ideal for: Anyone with very limited counter space during cooking or shoppers whose main requirement is a clearly specified touchscreen display.
Bottom line: We recommend the Ninja for buyers who need an oven-style air fryer that can stand upright between cooking sessions.
“We recommend the Ninja for buyers who need an oven-style air fryer that can stand upright between cooking sessions.”
As an Amazon Associate we earn from qualifying purchases.
Before You Start
Read the manual before plugging in the fryer. Digital controls differ: some models require you to choose a function before entering a time, while others start as soon as you press the power or start button. Confirm the basket and crisper plate are seated correctly. Remove packaging, stickers, and protective film. Wash removable food-contact parts and dry them fully.
Use a recipe written for an air fryer when possible. Oven directions may need less time in a small, fast-heating fryer. Do not fill the basket above its marked limit, block the airflow, or use loose parchment while preheating; a fan can pull it into the heating element.
Step-by-Step Instructions
Step 1: Prepare the fryer and food
Set the fryer on the cleared surface, slide in the clean, dry basket, and plug the appliance into a suitable outlet. Prepare food in pieces of similar size so they cook at a similar rate. Pat wet ingredients dry, and add only a light coating of oil if the recipe calls for it.
Tip: Do not pour oil into the bottom of the drawer. Coat the food lightly instead, unless your manual gives different directions.
Check: The fryer sits level, the basket is fully inserted, and the food is portioned without exceeding the basket’s fill line.
Step 2: Choose a cooking method
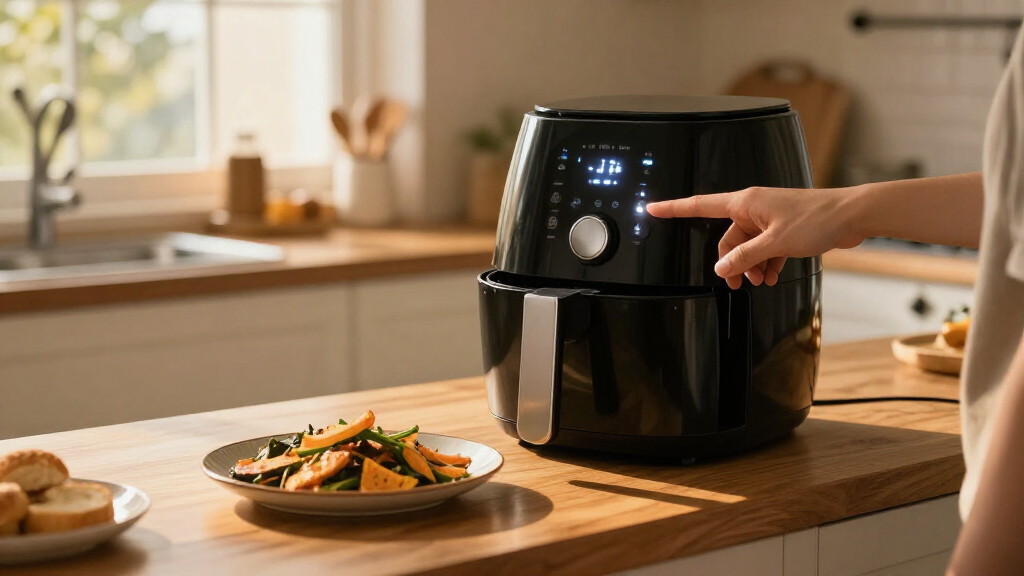
Press the power button, then choose a preset such as air fry, bake, roast, or reheat if your model offers one. For a first batch, follow the recipe or food package instructions and choose the closest matching function. If the fryer has no relevant preset, select the basic air-fry mode.
Tip: Presets are starting points. They do not identify the amount or thickness of your food, so plan to check it before the displayed time ends.
Check: The display shows the selected function or an icon that matches the cooking mode you intended to use.
Step 3: Set the temperature
Use the temperature up and down controls to enter the temperature from your recipe or package directions. Check whether the display uses Fahrenheit or Celsius before you confirm the setting. If converting a conventional oven recipe, use an air-fryer recipe or the manual’s guidance rather than assuming the same temperature and time will work.
Tip: A temperature that is too high can brown the surface before the center cooks. For unfamiliar foods, follow a tested recipe and check early.
Check: The displayed temperature matches the one you intended, including the correct unit.
Step 4: Set the cooking time and start
Press the time control and set the recipe’s cooking time with the plus and minus buttons or dial. Press start if your fryer requires it. Stay nearby during the first batch so you can learn how quickly your model cooks. If the manual recommends preheating, run the preheat cycle before adding food; otherwise, follow the recipe’s instructions.
Tip: The countdown may pause when you pull out the basket, or the fryer may continue running. Check the manual so you know how your model behaves.
Check: The timer counts down and the display shows that the fryer is heating or cooking.
Step 5: Check, turn, or shake the food
When the recipe’s halfway point arrives, carefully pull out the basket using its handle. Keep your face and hands clear of escaping hot air. Shake small items such as fries, or turn larger pieces with heat-safe tongs. Spread the food back into a single layer where possible, then slide the basket fully into place.
Tip: Some models pause automatically when the basket is removed. If yours does not, use the controls as directed in the manual.
Check: Food is rearranged without crowding, and the fryer resumes or continues cooking as expected.
Step 6: Check doneness before serving
When the timer ends, remove the basket carefully and inspect the food. For meat, poultry, and other foods with a specified safe internal temperature, insert a food thermometer into the thickest part and compare the reading with current food-safety guidance. For other foods, check the recipe’s texture and color cues. Add short cooking intervals if needed, checking again each time.
Tip: A browned outside does not prove that the center is cooked. Do not rely on appearance alone for foods that need a safe internal temperature.
Check: The food meets the recipe’s doneness cues and, when required, reaches its safe internal temperature.
Step 7: Turn off and clean the fryer
Switch the fryer off and unplug it when the cooking session is finished. Let the basket and drawer cool until safe to handle. Remove food and wash the removable parts according to the manual. Wipe the inside and outside with a soft, damp cloth, keeping water away from electrical parts. Dry all parts completely before reassembling or storing the fryer.
Tip: Avoid abrasive pads and metal utensils that can damage a nonstick coating. Do not immerse the main appliance in water.
Check: The fryer is unplugged, removable parts are clean and dry, and no food residue remains around the basket or heating area.
Common Mistakes to Avoid
- Filling the basket too full or piling food in a thick layer. — Keep food below the fill line and leave room for hot air to circulate. Cook multiple batches when needed.
- Trusting a preset or timer without checking the food. — Use presets as a starting point. Check early, follow recipe cues, and use a thermometer for foods that require one.
- Adding loose parchment or foil before food is in the basket. — Follow the manual’s liner instructions. Keep liners weighed down by food and clear of the heating element.
- Cleaning the fryer while it is hot or using water on its electrical body. — Switch off, unplug, and let the unit cool. Clean the main appliance with a damp cloth only.
Troubleshooting
Problem: The display does not turn on.
Solution: Check that the plug is firmly seated and the outlet works. Confirm that the basket is inserted if your model has a safety interlock. If the display remains off, unplug the fryer and consult the manual or manufacturer.
Problem: The food is pale or soft instead of crisp.
Solution: Cook a smaller batch, pat wet food dry, and shake or turn it during cooking. Add a brief cooking interval and check again. Avoid adding excess oil.
Problem: The outside is dark but the center is undercooked.
Solution: Lower the temperature and extend the cooking time in short intervals. Arrange pieces with space between them and check the thickest piece with a thermometer when appropriate.
Problem: The fryer pauses or displays an error when the basket is removed.
Solution: Slide the basket back in fully and check whether the manual says the unit resumes automatically. If an error remains, note its code and follow the model’s troubleshooting instructions.
What Success Looks Like
Your first batch is cooked to the recipe’s doneness cues, with a safe internal temperature where required. The fryer displayed the selected mode, temperature, and time, and responded as expected when you checked or rearranged the food. After cooling, the appliance and removable parts are clean, dry, and ready for storage or another batch.
Next Steps
Write down the settings and results for foods you cook often, including the portion size and whether you shook or turned them. Adjust one setting at a time on later batches so you can tell what changed. Check and clean the fryer after each use, and inspect its cord, basket coating, and vents regularly. Contact the manufacturer if an error persists or the appliance shows damage.
Frequently Asked Questions
Do I need to preheat a digital air fryer?
Follow the manual and recipe. Some models have a preheat cycle; others do not require one. If you preheat, add food only when the cycle ends unless the instructions say otherwise.
Can I use an oven recipe?
Yes, but the fryer may cook faster because its cooking space is smaller and air circulates around the food. Use the manual’s conversion guidance or a tested air-fryer recipe, and check the food before the suggested time ends.
Why does the timer start but the fryer not heat?
Confirm that the correct cooking mode is selected, the basket is fully inserted, and the start control has been pressed. If the display shows an error or the fryer stays cold, follow the manual’s troubleshooting steps.
Can I put the basket and tray in the dishwasher?
Check the manual for your exact model. Some removable parts are dishwasher-safe and others require hand washing. Keep the main appliance out of the dishwasher and away from standing water.