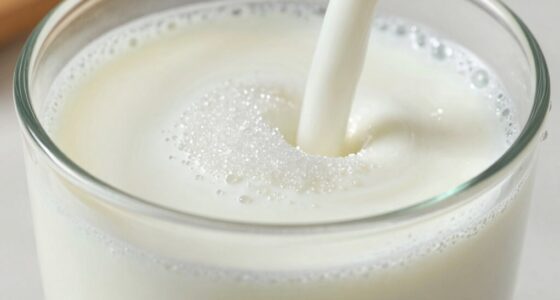
To fix thin latte foam quickly, first check that your milk is heated to 140°F–150°F, using a thermometer for accuracy. Adjust your steaming technique by keeping the wand just below the surface to incorporate air properly, and create a whirlpool for microbubbles. Pour and swirl the milk gently, and consider switching to a higher-quality or better-suited milk alternative. Small tweaks like these can turn thin foam into rich, velvety froth—learn more to master every step.
Key Takeaways
- Gently swirl the milk to redistribute microbubbles and improve foam density quickly.
- Add a splash of cold milk or water to stabilize thin foam instantly.
- Slightly lower the steam wand to introduce more air during reheating.
- Adjust steam temperature to 140°F–150°F to prevent over-heating and thinning the foam.
- Experiment with different milk brands or types for better initial frothing results.

If your latte foam turns out too thin, there’s no need to start over—quick adjustments can help you achieve the rich, creamy texture you want. Thin foam, or low foam density, often results from using artificial milk, which tends to produce less stable foam compared to fresh, whole milk. If you’re working with artificial milk, don’t despair; there are simple ways to improve the foam quality without wasting your coffee.
First, consider the temperature of the milk. Artificial milk often responds differently to steaming, so you might need to adjust your technique. Steam the milk just until it reaches around 140°F to 150°F; over-heating can break down the proteins responsible for creating stable foam, leading to a thinner, less dense froth. If your milk isn’t reaching the right temperature or if it’s too hot, the foam will lack body. Using a thermometer can help you monitor this precisely and avoid overheating.
Steaming artificial milk to 140°F–150°F ensures stable, creamy foam without breaking down proteins.
Next, focus on the steaming technique itself. When steaming, keep the steam wand just below the surface of the milk to introduce air, which is crucial for forming good foam. If you’re using artificial milk, you might need to incorporate more air than usual. You can do this by slightly increasing the speed of your steam wand or by angling the pitcher to create a whirlpool, which helps incorporate tiny air bubbles, resulting in a denser foam. Also, don’t forget to tilt the pitcher to keep the wand submerged but close to the surface, maximizing air absorption. Understanding milk composition can help you select better options for frothing. Additionally, paying attention to the quality of milk can make a noticeable difference in foam stability and density. For optimal results, consider exploring milk alternatives that may froth better than traditional artificial options.
Another quick fix is to give your milk a gentle swirl after steaming. This redistributes the microbubbles, improving foam density and creating a smoother, more stable froth. If your foam remains thin, try adding a splash of cold milk or even a tiny bit of cold water to the steamed milk before pouring. This can sometimes help increase foam stability, especially when working with artificial milk, which doesn’t always produce as thick or lasting a foam. Incorporating proper frothing techniques can further enhance your results and help you achieve a more velvety finish. Additionally, understanding milk composition can help you select better options for frothing.
Finally, if you notice consistent issues with foam quality, consider switching brands or types of artificial milk. Some formulations are better suited for frothing than others, offering improved foam stability and density. Experiment with different products until you find one that produces thicker, more velvety foam. Remember, mastering foam density with artificial milk is a matter of adjusting your steaming technique, temperature, and sometimes the milk itself. With these quick tweaks, you’ll be able to turn thin, lackluster foam into a creamy, luxurious top layer in no time.
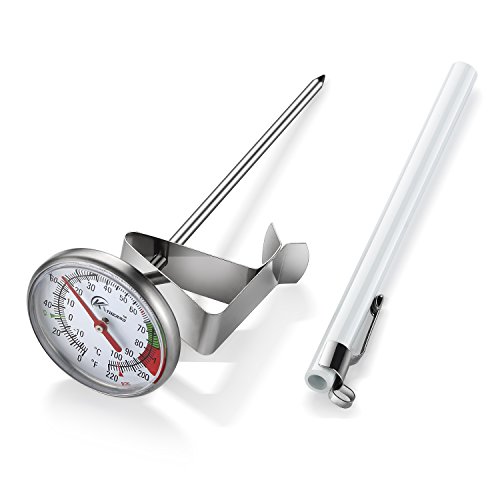
KT THERMO Instand Read 2-Inch Dial Thermometer,Best for The Coffee Drinks,Chocolate Milk Foam
- Multi-stage clip design: Adjusts for easy temperature reading
- Safe, simple measurement: Accurately measures coffee and milk foam
- Wide temperature range: 0°F to 220°F for boiling or freezing
As an affiliate, we earn on qualifying purchases.
As an affiliate, we earn on qualifying purchases.
Frequently Asked Questions
Can Different Milk Types Affect Foam Thickness?
Yes, different milk types markedly affect foam thickness. Alternative milk options like almond, soy, or oat milk have varying milk texture variations, which influence how well they can foam. For instance, oat milk generally produces creamier, thicker foam, while almond milk tends to create lighter, less dense foam. Your choice of milk impacts the quality and volume of your latte foam, so experimenting with different options helps you find your ideal texture.
How Does Temperature Influence Foam Stability?
Think of temperature as the heartbeat of your foam’s stability. When you master temperature effects, you control foam consistency. Too hot, and the delicate bubbles burst like fragile dreams; too cold, and they refuse to form. Ideal steaming temperatures create a warm embrace, encouraging bubbles to grow strong and lasting. By maintaining the right temperature, you guarantee your latte foam remains smooth, velvety, and beautifully resilient throughout every sip.
Is Special Equipment Needed for Thicker Foam?
You don’t need special equipment to achieve thicker foam, but the right tools can aid. A good steam wand or an electric frother makes controlling foam texture easier, leading to denser, creamier results. While basic frothing pitchers work, investing in high-quality equipment guarantees better consistency and allows you to customize your foam. Ultimately, the equipment necessity depends on your desired foam quality and how much effort you’re willing to put in.
How Long Should I Steam Milk for Optimal Foam?
You should steam milk for about 20-30 seconds to achieve ideal foam, focusing on creating a creamy, velvety texture. Investigating milk frothing shows that longer steaming can break down protein structures, resulting in thinner foam. For best foam textures, aim for a temperature of around 140°F, and keep the steam wand just below the surface to incorporate enough air. This balance ensures rich, thick foam without over-whipping.
Can Adding Ingredients Improve Foam Density?
Adding ingredients like milk frothing stabilizers or flavor enhancers can improve foam density and flavor enhancement, but they may alter the foam texture. For richer, creamier foam, opt for fresh, whole milk, and consider adding a pinch of sugar or stabilizer designed for frothing. These additions can create a thicker, more durable foam, elevating your latte experience without sacrificing the desired texture.

Zulay Kitchen Powerful Milk Frother Wand With Duracell Batteries – Ultra Fast Handheld Drink Mixer – Electric Whisk Foam Maker for Coffee, Lattes, Cappuccino & Matcha – Z1 Motor – Black
- Quick, Creamy Froth: Creates rich foam in seconds
- Versatile Use: Perfect for matcha, coffee, and shakes
- Durable Quality: Made with premium, rust-proof materials
As an affiliate, we earn on qualifying purchases.
As an affiliate, we earn on qualifying purchases.
Conclusion
So, next time you’re faced with thin latte foam, don’t panic—just embrace the irony. Instead of stressing over perfect froth, remember that a little extra practice and patience can turn your cup into a masterpiece. After all, it’s not about flawless foam; it’s about enjoying the process—and maybe, just maybe, laughing at your frothy failures along the way. Because in the end, a latte’s charm isn’t just about the foam, but the fun you have creating it.

Milk Frothing Pitcher, 8.5oz/12oz/20oz/32oz/50oz/66oz Milk Frother Cup Stainless Steel, Espresso Accessories, Milk Steaming Pitchers Coffee Cappuccino Latte Art Barista Milk Jug Cup with Art Pen,12oz
- Multi-functional Milk Frothing Pitcher: Froths, steams, measures, serves milk
- Includes Latte Art Pen: Create beautiful coffee patterns
- Premium Stainless Steel Construction: Rust-proof, stain-proof, heat-resistant
As an affiliate, we earn on qualifying purchases.
As an affiliate, we earn on qualifying purchases.
Milk Frothing Pitcher, 8.5oz/12oz/20oz/32oz/50oz/66oz Milk Frother Cup Stainless Steel, Espresso Accessories, Milk Steaming Pitchers Coffee Cappuccino Latte Art Barista Milk Jug Cup with Art Pen,12oz
- Multi-functional Milk Frothing Pitcher: Froths, steams, measures, serves milk
- Includes Latte Art Pen: Create beautiful coffee patterns
- Premium Stainless Steel Construction: Rust-proof, stain-proof, heat-resistant
As an affiliate, we earn on qualifying purchases.
As an affiliate, we earn on qualifying purchases.