
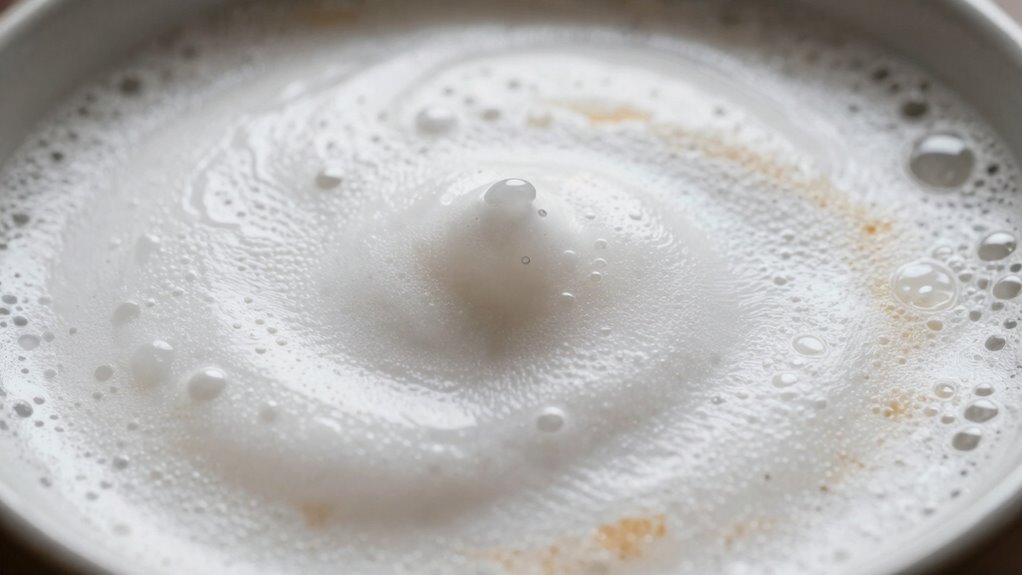
To understand microfoam texture, think of it as a silky, velvety milk that resembles wet paint—glossy, smooth, and reflective. When you steam milk correctly, you’ll see a shiny surface with tiny, uniform bubbles, indicating stable microfoam perfect for latte art. If the surface looks dull or has large bubbles, it’s a sign to adjust your technique. Keep practicing, and you’ll master the nuances of creating that ideal, wet paint-like microfoam every time.
Key Takeaways
- The ‘wet paint’ cue indicates microfoam with a glossy, smooth surface resembling freshly painted walls, signifying proper texture.
- Glossy, reflective microfoam shows that the milk has the right density and stable microbubbles.
- Achieving the ‘wet paint’ texture involves gentle aeration, correct steam wand positioning, and temperature control.
- Visual cues like shine and smoothness help baristas instantly assess and adjust microfoam quality during steaming.
- Proper microfoam should look and feel like wet paint—velvety, shiny, and uniform—ensuring ideal latte art and drink consistency.
What Is Microfoam and Why Does Its Texture Matter?

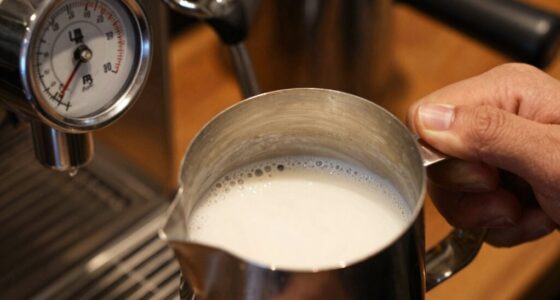
Have you ever wondered why baristas pay so much attention to microfoam? It’s because the right texture makes all the difference in your coffee experience. Microfoam is the silky, velvety milk created through precise frothing techniques that incorporate proper milk temperature. When milk is heated to the ideal temperature—around 140-150°F—it produces smoother, more stable microfoam. This texture matters because it allows you to craft beautiful latte art and ensures your drink has an even, creamy consistency. Achieving the perfect microfoam involves controlling how you froth, paying attention to the milk’s temperature and incorporating gentle, consistent motions. Mastering these details elevates your coffee, making every sip smooth and enjoyable. Proper frotting techniques are essential for developing the ideal microfoam, especially as At-home frothing devices become increasingly sophisticated, helping you achieve professional-quality microfoam with ease, especially when you understand the importance of microfoam texture. Additionally, understanding the role of temperature control can significantly improve your microfoam quality. For instance, utilizing temperature gauges on frothing devices can aid in maintaining the optimal milk temperature for the best microfoam.
Why Is the ‘Wet Paint’ Analogy Perfect for Microfoam?

The ‘wet paint’ analogy captures the look and feel of perfect microfoam perfectly. It visually resembles freshly painted surfaces, showing a glossy, smooth finish. This comparison also helps baristas quickly identify consistent textures that are easy to work with. Additionally, understanding the qualities of energy-efficient cloud servers can inspire innovative techniques in achieving optimal microfoam textures. Recognizing textural consistency is key to mastering latte art and delivering a satisfying coffee experience. Moreover, maintaining precise temperature control is essential for creating microfoam that mimics the smooth, reflective surface of fresh paint. Developing a keen eye for visual cues, such as glossiness and smoothness, can further improve foam quality and consistency. Paying attention to foam stability ensures the microfoam retains its ideal texture during latte preparation.
Visual Similarity to Paint
Microfoam’s appearance closely resembles freshly applied wet paint, which makes the analogy especially fitting. The glossy, smooth surface reflects light just like wet paint, emphasizing the microfoam’s velvety texture. This visual similarity helps you gauge milk density and foam stability at a glance. When the microfoam looks like paint, you know the milk has been steamed to the right temperature and consistency, ensuring ideal microfoam formation. The paint-like sheen indicates uniform bubbles and a stable foam structure, critical for latte art. The table below highlights key visual cues:
| Feature | Indicator |
|---|---|
| Glossiness | High milk density |
| Smooth surface | Foam stability |
| Uniform bubbles | Consistent microfoam |
This analogy simplifies understanding microfoam quality instantly. Additionally, recognizing the Free Floating nature of microfoam can help baristas adjust their steaming techniques to achieve the perfect texture. Understanding the visual cues also assists in troubleshooting common issues like over- or under-steaming.
Consistent Texture Indicator
When evaluating the quality of your microfoam, consistency in texture is the key indicator that you’ve achieved the right balance during steaming. The ‘wet paint’ analogy helps you recognize uniform foam, where the foam consistency remains smooth and silky without lumps or separation. This visual cue aligns with the importance of texture consistency in achieving a professional finish. It also indicates that the milk has been steamed correctly, creating a steady, velvety microfoam. To gauge this, look for a foam that flows smoothly and doesn’t break apart easily. Achieving this level of texture harmony requires practice and attention to detail, which are essential for consistently good results. Incorporating milk steaming techniques from support resources can further refine your skills and improve your outcomes. A well-balanced microfoam also reflects holistic health practices that emphasize harmony and balance within the process. Recognizing visual cues like the ‘wet paint’ analogy can help you develop a more intuitive sense of microfoam quality over time. These clues confirm your milk steaming process is on point, giving you the consistent texture needed for perfect latte art and balanced drinks.
Easy for Baristas
Using the ‘wet paint’ analogy makes it easier for baristas to quickly assess microfoam quality because it provides a clear, visual reference for smoothness and consistency. When you’re milk steaming, aiming for a texture like wet paint helps you identify the right level of silkiness needed for perfect latte art. This analogy simplifies the process, making it easier to judge whether your microfoam is smooth enough to pour beautiful, well-defined designs. Rather than relying solely on feel or sound, you get a visual cue that guides your technique. It’s especially helpful for beginners or when perfecting your latte art skills, as it ensures your microfoam is consistently ideal, making the entire steaming process more straightforward and less stressful.
How Can You Achieve the Perfect Microfoam Texture?
Achieving the perfect microfoam texture requires attention to detail and proper technique. First, focus on the milk temperature; aim for around 140°F to 150°F to guarantee smooth frothing without overheating. Use a clean frothing pitcher to control the steam and avoid inconsistencies. Position the steam wand just below the milk’s surface to introduce air gradually, creating tiny bubbles. Maintain a steady hand and angle the pitcher slightly for even heat distribution. Always listen for a gentle hissing sound, indicating ideal microfoam formation. Keep the pitcher at a slight tilt, and don’t rush the process. With practice, these steps help you produce a velvety, glossy microfoam that’s perfect for latte art and balanced espresso drinks. Proper machine maintenance also plays a crucial role in ensuring consistent steam quality and microfoam texture. Additionally, understanding the microfoam texture helps in refining your technique for better results. Developing a consistent steaming technique also involves monitoring the steam pressure, which influences the quality of your microfoam. Paying attention to steam quality ensures you achieve the smooth, shiny finish that characterizes professional microfoam. Regularly cleaning your equipment prevents milk residue buildup, which can negatively impact steam performance and foam consistency.
What Tools and Techniques Help Create Glossy, Smooth Microfoam?

Selecting the right tools and applying proper techniques are key to creating glossy, smooth microfoam. Start with a high-quality milk steaming pitcher that provides control over your milk’s motion. Use fresh, cold milk to achieve better foam consistency. When steaming, position the steam wand just below the surface to introduce air gradually, creating tiny bubbles. Keep the pitcher at an angle and maintain a steady motion to incorporate air evenly. Focus on achieving a velvety, glossy appearance by listening to the sound of the steam—steady and gentle. Proper technique guarantees the foam remains smooth and uniform, with no large bubbles or separation. Additionally, understanding the microfoam texture helps you identify the ideal sheen and consistency during steaming. Developing a good steaming technique involves consistent practice and attention to detail, which leads to better control over the foam quality. With the right tools and consistent practice, you’ll master milk steaming that produces microfoam with the perfect sheen and texture.
What Are Common Mistakes When Frothing Milk: and How Can You Fix Them?
One common mistake when frothing milk is introducing too much air too quickly, which creates large, unstable bubbles instead of the smooth microfoam you want. This affects milk steaming and results in uneven foam with poor foam density. To fix this, focus on the technique: keep the steam wand just below the surface to gently incorporate air, then submerge for consistent heating.
Avoid adding air too quickly; keep the steam wand just below the surface for smooth, dense microfoam.
- Avoid positioning the wand too high, which traps air and ruins foam texture.
- Don’t overstretch the milk; overfilling the pitcher makes control harder.
- Keep the steam wand steady to prevent large bubbles and maintain a creamy consistency.
Troubleshooting Microfoam: Tips for Perfect Results Every Time

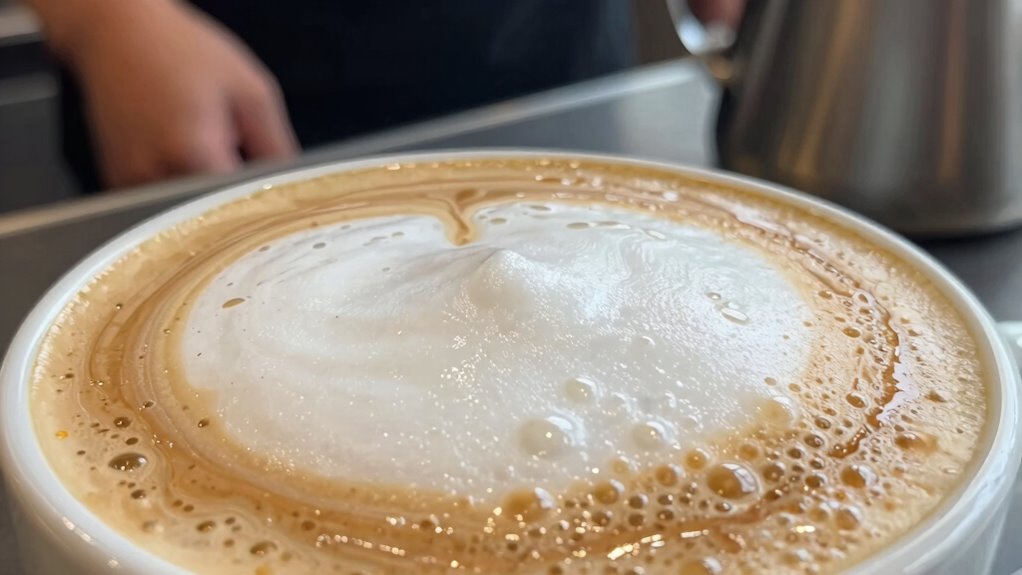
When troubleshooting microfoam, pinpointing common issues can help you achieve consistently smooth and velvety results. If your milk frothing produces large bubbles or uneven texture, try adjusting your steam wand position or frothing speed. Overheating the milk can cause it to become too thick, so monitor the temperature closely. If the microfoam isn’t shiny or has a “wet paint” appearance, it’s likely under-foamed; continue aerating until you reach the right consistency. For better espresso art, aim for a silky, paint-like microfoam that integrates seamlessly with the espresso shot. Practice controlling your steam wand and milk texture until you consistently produce the ideal microfoam. With patience and adjustments, you’ll master microfoam that elevates your latte art and overall milk frothing skills.
Frequently Asked Questions
Can Microfoam Be Used for Latte Art?
Yes, microfoam can be used for latte art. Your success depends on achieving the right microfoam consistency, which should be smooth, velvety, and free of large bubbles. Using proper latte art techniques, like pouring with control and steady hand movements, helps create clear, sharp designs. When your microfoam is just right, you’ll find it easier to craft intricate patterns and make your latte art look professional and appealing.
How Does Milk Type Affect Microfoam Quality?
You’ll notice milk type greatly impacts microfoam quality because of its milk fat and protein content. Whole milk, with higher fat and protein, creates richer, smoother foam ideal for latte art. Skim milk, lower in fat but higher in protein, produces lighter, more stable microfoam. Choose your milk based on the desired texture; higher protein levels help achieve that wet paint, velvety finish for your latte art.
Is There a Preferred Temperature for Frothing Milk?
You should aim for milk temperature around 140-150°F for frothing ideal microfoam. Too hot, and the milk loses sweetness and texture; too cold, and it won’t create the velvety microfoam you want. Think of it as a delicate balance—just warm enough to reveal richness without scorching. Keeping an eye on milk temperature guarantees your frothing results are consistently smooth, glossy, and perfect for latte art.
How Long Should Microfoam Be Steamed for Optimal Texture?
You should steam your milk for about 20-30 seconds to achieve ideal microfoam texture. This steaming duration allows the foam to develop foam stability while staying silky and smooth, mimicking wet paint. Keep the steam wand just below the surface to incorporate enough air without creating large bubbles. Be attentive to the temperature, ideally around 140-150°F, to ensure the foam remains delicate and velvety for your perfect latte or cappuccino.
Can Non-Dairy Milk Create Similar Microfoam Textures?
You can achieve similar microfoam textures with plant-based alternatives, but expect some frothing challenges. Non-dairy milks like oat, soy, and almond often foam well if they’re barista blends designed for frothing. However, they might require different steaming times or techniques. To get that perfect microfoam, experiment with your milk’s temperature and frothing method, and choose options specifically formulated for creating creamier, velvety textures.
Conclusion
Mastering microfoam takes patience and practice, but with the right techniques, you’ll craft espresso drinks that look as good as they taste. Remember, practice makes perfect—don’t be discouraged by initial mishaps. Keep experimenting, stay attentive to texture, and you’ll soon create that glossy, smooth microfoam every time. As the saying goes, “Rome wasn’t built in a day”—so enjoy the journey to perfect your craft and impress every time.