

Microfoam is a velvety, micro-sized foam of steamed milk that blends smoothly with espresso, creating a rich and creamy texture in your latte. It enhances flavor by layering and integrating natural coffee aromas and sweetness, making each sip more enjoyable. When you master microfoam, your drinks look stunning and taste better. If you keep exploring, you’ll uncover how to perfect this skill and elevate your coffee experience even further.
Key Takeaways
- Microfoam is a velvety, ultra-fine milk layer created by aerating milk proteins during steaming.
- It enhances latte flavor by blending seamlessly with espresso, adding richness and smoothness.
- Proper microfoam provides a silky texture that improves the overall mouthfeel of the drink.
- Stable microfoam maintains consistent quality, preventing large bubbles and harsh flavors.
- The fine, integrated bubbles amplify natural coffee aromas and sweetness, elevating taste experience.

Subminimal Performance Milk Foamer – NanoFoamer Lithium Handheld Frother – Rechargeable, Dual-Speed – Microfoamed Milk in 30sec, Barista-Style Coffee Drinks at Home – White Special Edition
High-Performance Power : Cafe-quality microfoamed milk is now possible with a handheld tool! No need for a costly…
As an affiliate, we earn on qualifying purchases.
As an affiliate, we earn on qualifying purchases.
What Is Microfoam and Why Is It Key to Great Lattes?

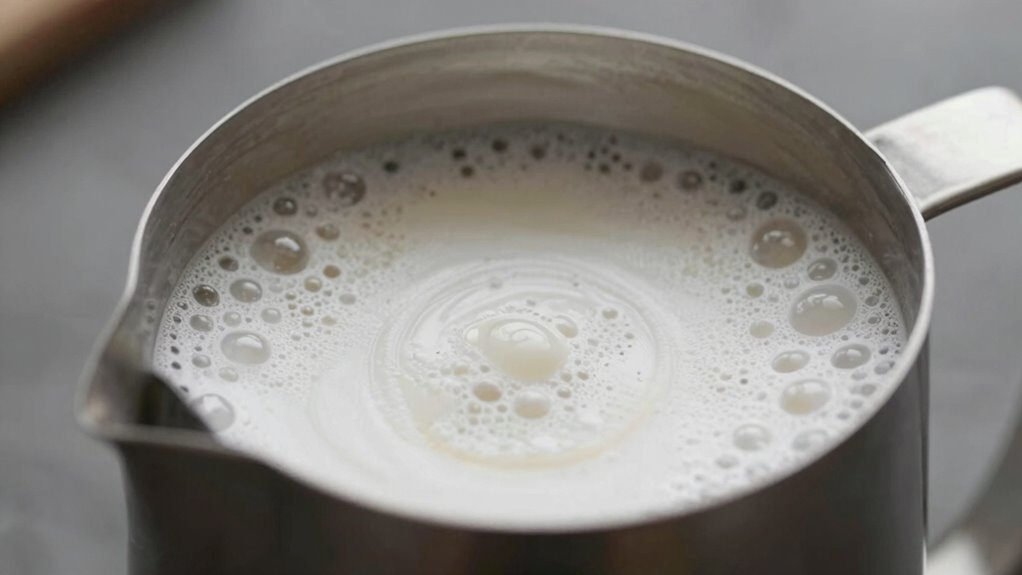
Have you ever wondered what makes a latte look so smooth and inviting? It’s all about microfoam, which results from understanding milk composition and microfoam science. Milk contains water, proteins, fats, and sugars, which influence how it froths. When heated and aerated properly, milk’s proteins unfold and stabilize tiny bubbles, creating microfoam—an ultra-fine, velvety layer. This microfoam is essential because it blends seamlessly with espresso, adding a rich texture and enhancing flavor. The science behind microfoam explains how these tiny bubbles form and remain stable, giving your latte its signature smooth appearance. Proper milk frothing techniques ensure microfoam is achieved consistently, making a noticeable difference in your coffee experience. Without proper microfoam, your latte might look airy or frothy but lack the luxurious mouthfeel that makes it so enjoyable. Mastering this process truly elevates your coffee experience.

Milk Frothing Pitcher, 8.5oz/12oz/20oz/32oz/50oz/66oz Milk Frother Cup Stainless Steel, Espresso Accessories, Milk Steaming Pitchers Coffee Cappuccino Latte Art Barista Milk Jug Cup with Art Pen,12oz
Perfect Combination Of Milk Frothing Pitcher And Latte Art Pen: The milk frother jug can be used in…
As an affiliate, we earn on qualifying purchases.
As an affiliate, we earn on qualifying purchases.
Essential Tools for Frothing Perfect Microfoam

To achieve perfect microfoam, you need the right tools that make frothing easier and more consistent. Starting with good frothing equipment, such as an espresso wand or a milk frother, helps you control the process and produce smooth, velvety microfoam. Maintaining the ideal milk temperature—around 140°F to 150°F—is vital to prevent overheating and preserve sweetness. A thermometer can help you monitor this precisely. A quality steaming pitcher allows you to position the wand correctly for even heat distribution and ideal frothing. Additionally, a reliable milk jug with a spout aids in creating the right foam texture. Using the right tools ensures you can focus on technique while achieving consistent, professional-grade microfoam for your lattes. Choosing the right frothing tools can greatly impact the quality of your microfoam and overall coffee experience.
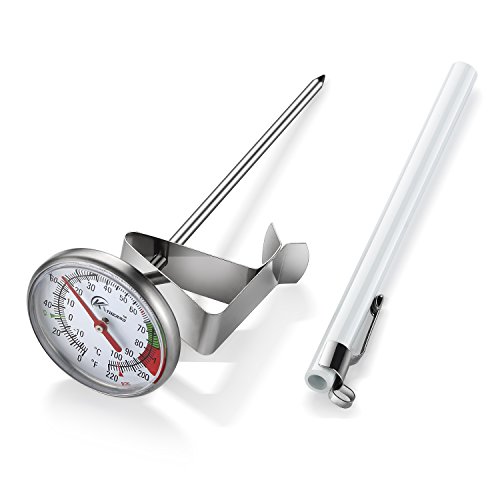
KT THERMO Instand Read 2-Inch Dial Thermometer,Best for The Coffee Drinks,Chocolate Milk Foam
DESIGN:Multi-stage design of the fixed clip, adjust the thermometer read the location of the disk surface to facilitate…
As an affiliate, we earn on qualifying purchases.
As an affiliate, we earn on qualifying purchases.
How to Froth Microfoam at Home : Easy Step-by-Step Guide

Frothing microfoam at home is simpler than you might think when you follow a few easy steps. First, choose fresh, cold milk and heat it to about 140°F (60°C), ensuring the milk reaches the right temperature for ideal foam stability. Use your milk frother or steam wand, positioning it just below the surface to introduce air gently. Move the wand in a consistent motion, creating a whirlpool that evenly incorporates air and heats the milk. Keep an eye on the temperature with a thermometer to prevent overheating, which can break down foam stability. Once you see a silky, velvety texture form, turn off the frother. Tap the pitcher on a surface to remove large bubbles, then swirl gently for a smooth microfoam ready for your latte art. Additionally, understanding performance in your frothing equipment can help you achieve more consistent results.

𝟔𝟕%𝐨𝐟𝐟 Large Capacity Milk Frother: 4-in-1 Electric Milk Steamer 350ml, 7700RPM High Speed, 120s Fast Frothing, 𝐇𝐨𝐭 & 𝐂𝐨𝐥𝐝 Foam Maker, Helpful Stainless Steel for Latte – Grayish Black
Professional Barista Performance: Experience café-quality results with our advanced Milk Frother featuring 450W high power and 6000rpm motor…
As an affiliate, we earn on qualifying purchases.
As an affiliate, we earn on qualifying purchases.
Why Microfoam Improves Your Coffee’s Texture and Flavor

Microfoam gives your coffee a smoother, creamier texture that makes every sip more enjoyable. It also opens richer flavor layers, so you taste more nuance in your drink. When you master microfoam, your coffee experience elevates to a new level. Proper technique is key to achieving the ideal microfoam consistency, ensuring your latte has that perfect balance of texture and flavor.
Richer Coffee Texture
A well-textured coffee benefits from the silky, velvety microfoam that sits atop your brew. This microfoam enhances the overall texture, making each sip feel richer and more satisfying. The key is in the milk composition, which determines the microfoam’s creaminess and stability. When you steam milk properly, it creates a smooth, microbubble-rich foam perfect for latte art, adding visual appeal and a luxurious mouthfeel. The microfoam’s fine bubbles blend seamlessly with the coffee, creating a uniform, velvety surface. This not only improves the tactile experience but also helps distribute heat evenly. As a result, your latte feels creamier without being overly heavy, elevating the overall coffee experience with a richer, more indulgent texture. Proper steaming technique also prevents the formation of harsh chemicals and ensures the microfoam stability, which is essential for maintaining the quality of your latte.
Enhanced Flavor Profiles
When microfoam is properly integrated into your coffee, it enhances both the flavor and aroma by creating a harmonious balance of textures. This silky foam accentuates the coffee’s natural sweetness, making the milk taste richer and more satisfying. It also boosts aroma enhancement, allowing the subtle coffee notes to emerge more vividly. Microfoam’s fine bubbles help blend flavors seamlessly, resulting in a more complex and layered experience. You’ll notice that the microfoam’s smooth mouthfeel elevates the overall taste, making each sip more enjoyable. Understanding emulsification is key to achieving the perfect microfoam consistency.
Tips for Creating Velvety Microfoam Every Time

To create velvety microfoam every time, start with fresh, cold milk to guarantee better texture. Use proper steam wand technique and keep the wand just below the surface of the milk, moving it consistently. Practice maintaining a steady motion to develop the skill needed for smooth, creamy microfoam.
Use Fresh, Cold Milk
Ever wonder why your microfoam sometimes falls flat? The key is using fresh, cold milk. Milk freshness affects foam stability, so always choose recently opened cartons or bottles. Cold temperature is essential because it helps you achieve a smooth, velvety texture. When milk is too warm, it doesn’t foam properly and can scald easily. Keep your milk refrigerated until just before steaming, and avoid letting it sit out for too long. Using cold milk also makes it easier to control the steaming process, resulting in better microfoam. Remember, the quality of your milk impacts the final texture of your latte. Energy-efficient milk handling not only improves foam quality but also aligns with sustainable practices.
Proper Steam Wand Technique
Mastering proper steam wand technique is essential for creating velvety microfoam consistently. First, position the steam wand just below the milk surface at a slight angle, ensuring it introduces air evenly. Keep the wand’s tip near the milk’s surface to create tiny bubbles, then gradually lower it to heat the milk to about 140°F–150°F, monitoring the temperature. Proper steam wand positioning helps control airflow and prevents large bubbles. Use this visual guide:
| Step | Action | Focus Area |
|---|---|---|
| 1 | Position wand near surface | Milk surface, air introduction |
| 2 | Keep wand steady | Consistent motion |
| 3 | Lower wand as milk heats | Milk temperature |
| 4 | Maintain gentle swirl | Microfoam uniformity |
This technique ensures smooth, velvety microfoam every time. Proper technique also involves understanding how the steam wand’s air infusion impacts foam quality, making precise positioning crucial for optimal results.
Practice Consistent Motion
Practicing consistent motion while steaming milk is key to achieving smooth, velvety microfoam every time. Steady, uniform movement guarantees you control milk temperature and promote foam stability, resulting in a glossy microfoam ideal for lattes. To maintain consistency, focus on your wrist and arm movements, keeping the pitcher at a slight angle. Consistent motion prevents uneven heating and large bubbles, which can ruin your microfoam. Remember, the goal is to create a whirlpool effect that evenly incorporates air. Pool terminology can help you better understand the importance of consistent flow and movement in creating the perfect microfoam.
Troubleshooting Microfoam: Fix Common Frothing Problems

When your microfoam isn’t turning out as expected, pinpointing the problem can save you time and frustration. One common issue is incorrect milk temperature; if it’s too hot or too cold, the foam won’t develop properly. Aim for a milk temperature between 140°F and 150°F for ideal microfoam. Also, check your frothing equipment; old or malfunctioning steam wands may not produce enough pressure or consistent steam, resulting in flat or uneven foam. Make sure your frothing pitcher is clean and properly positioned under the steam wand. Adjust your technique if needed, and verify your milk is fresh. Troubleshooting these aspects helps create smooth, velvety microfoam that enhances your latte’s taste and texture. Additionally, understanding cookie categories can help optimize your browsing experience when researching troubleshooting tips online.
Avoid These Mistakes When Frothing Milk for Microfoam
Frothing milk for microfoam requires attention to detail, and avoiding common mistakes can make a big difference in your results. If you rush or ignore key factors like milk temperature and foam stability, your microfoam won’t be smooth or consistent. Overheating the milk can kill foam stability and create a burnt taste, while underheating prevents proper expansion. Make sure to steam to the right temperature, around 140-150°F. Also, avoid these mistakes:
Avoid common milk steaming mistakes: don’t overheat, ignore texture, or rush the process for perfect microfoam.
- Using cold milk straight from the fridge
- Overfilling the frothing pitcher
- Not venting the steam wand properly
- Focusing only on creating large bubbles
- Ignoring the importance of milk texture and temperature
- Neglecting to maintain proper venting and clearances to ensure safe and effective steaming
Pay attention to these details to achieve perfect, velvety microfoam every time.
Creative Ways to Use Microfoam Beyond Lattes

Microfoam isn’t just for lattes; you can get creative and elevate a variety of drinks and desserts with it. Use microfoam to craft stunning creative latte art on cappuccinos or hot chocolates, impressing friends or adding a personal touch to your morning brew. Beyond coffee, microfoam can top desserts like mousse or panna cotta, giving them a light, airy texture. You’ll also enjoy the microfoam health benefits, such as reduced fat content compared to whipped cream, making your treats healthier. Incorporating microfoam into drinks and desserts not only enhances their visual appeal but also improves mouthfeel and flavor. Experiment with different shapes and designs to take your presentation and taste experience to the next level. Understanding proper technique ensures consistent, beautiful microfoam every time.
How Perfect Microfoam Makes You a Better Home Barista

Mastering your frothing technique helps you create smooth, glossy microfoam every time. When you focus on consistency, your drinks improve and your skills grow more precise. With practice, perfect microfoam becomes a natural part of your home barista routine. Additionally, understanding the importance of art care can help preserve the quality of your equipment and enhance your overall coffee experience.
Frothing Technique Mastery
When you learn to control the frothing process, you can create consistently smooth and silky microfoam that elevates your coffee experience. Mastering your technique allows you to adapt to different milk alternatives, ensuring a creamy texture regardless of the type. Proper frothing also opens opportunities for flavor infusions, adding subtle tastes like vanilla or cocoa. To perfect your skills, focus on:
- Maintaining the right temperature for ideal foam
- Positioning the steam wand correctly
- Using a steady, gentle motion
- Practicing with various milk types and alternatives
- Incorporating flavor infusions during frothing
Consistent Foam Quality
Achieving consistent foam quality is the key to elevating your home coffee skills and creating professional-looking drinks. Maintaining the right milk temperature ensures your microfoam has the ideal texture consistency, making it easier to pour smooth, glossy foam. When your milk is too hot, the foam becomes thin and unstable; too cold, and it won’t develop the right stretch. Focus on steady steam pressure and gentle movement to produce uniform microfoam each time. Consistency in foam quality means your drinks will look better and taste more balanced. Practice controlling your steaming technique, and always monitor milk temperature to keep your microfoam predictable. Proper electrical setup and safety measures can also help you operate your espresso machine effectively, ensuring consistent results. With reliable texture, you’ll craft lattes that impress and enjoy the process of becoming a true home barista.
Final Tips for Mastering Microfoam and Elevating Your Coffee

To elevate your coffee with perfect microfoam, focus on refining your technique and paying attention to details that make a difference. Start by understanding milk composition; fresher milk with the right fat content creates better foam stability. Keep the milk temperature steady—around 140°F to 150°F—to maintain consistency and avoid scalding. Practice steady, controlled steam wands to introduce fine bubbles gradually. Consistent pouring technique ensures a smooth, glossy microfoam.
Master microfoam by controlling milk quality, temperature, and pour technique for smooth, glossy results.
- Use fresh, cold milk for better foam stability
- Maintain steady steam pressure and temperature
- Focus on creating small, uniform bubbles
- Practice pouring with controlled, smooth motions
- Regularly clean your equipment to prevent residue buildup
Frequently Asked Questions
Can Any Type of Milk Be Used to Make Microfoam?
You can use many types of milk to make microfoam, but some work better than others. Whole milk creates creamy, silky foam, while milk alternatives like almond or oat milk may need different frothing techniques. Keep in mind, each milk type’s protein and fat content affects the foam’s texture. Experiment with your preferred milk and frothing methods to find the perfect microfoam for your latte.
How Does Milk Temperature Affect Microfoam Quality?
Think of milk temperature control as your secret weapon in perfect milk frothing. If the milk gets too warm, microfoam can become thin or scalded, losing its silky texture. Ideally, keep the milk between 140-150°F to achieve rich, velvety microfoam. Too cold, and it won’t froth well. By managing milk temperature, you guarantee that your microfoam remains smooth and perfect for that luxurious latte experience.
Is It Necessary to Use a Steam Wand for Microfoam?
Yes, using a steam wand is essential for creating microfoam. You’ll want to master steam wand techniques like positioning and aerating the milk properly to achieve that silky, velvety texture. If you’re using milk alternatives, pay attention to their unique steaming characteristics, as some may require different techniques or temperatures. Practicing these skills guarantees your microfoam is smooth and perfect, elevating your latte experience every time.
How Long Can Microfoam Be Stored Before It Loses Quality?
Microfoam should be used within 15-20 minutes of steaming to maintain its freshness and texture. After this period, it begins to lose quality as the microbubbles collapse and it cools, affecting the taste and appearance. To preserve its best qualities, serve your latte promptly or store it in a warm container if you need to keep it briefly. This ensures ideal freshness and the perfect microfoam experience.
Does the Type of Coffee Influence the Microfoam’s Appearance?
Yes, the type of coffee bean and brewing method influence the microfoam’s appearance. When you choose a bean with a higher fat content, like a darker roast, it tends to produce creamier, more stable microfoam. Similarly, brewing methods like espresso extraction create better microfoam because of the pressure involved, resulting in a smooth, glossy texture. So, your coffee bean choice and brewing technique directly impact how your microfoam looks and feels.
Conclusion
Mastering microfoam is like nurturing a delicate bloom—you’ll see your coffee transform into a work of art. Every perfect swirl and velvety pour signifies your growing skill and passion. As you refine your technique, you’re not just making better lattes; you’re cultivating a deeper connection to your craft. Embrace each froth as a symbol of your journey—beautiful, evolving, and uniquely yours. Keep practicing, and watch your coffee—and confidence—rise.