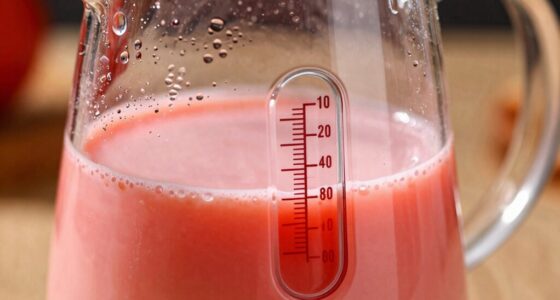

If your milk foam separates quickly, you’re likely missing key steps in your steaming technique. Make sure you heat the milk to about 140°F-150°F to improve stability, and introduce air gradually for a smooth, velvety texture. Position the steam wand just below the surface for even aeration, then submerge deeper to heat evenly. Using the right milk type also helps. Keep these tips in mind, and you’ll discover how to perfect your foam stability.
Open a free Amazon Business account
Business pricing, bulk buying and tax-exempt orders.
As an affiliate, we earn on qualifying purchases.
Key Takeaways
- Ensure milk is heated to 140°F-150°F for optimal foam stability and prevent protein breakdown.
- Introduce air gradually during steaming to create fine, uniform bubbles for lasting foam.
- Use whole milk or higher-fat options, as they produce more resilient and longer-lasting foam.
- Submerge the steam wand properly after initial aeration to heat the milk evenly without large bubbles.
- Avoid overheating or over-aerating, which weaken foam structure and cause rapid separation.

If you want your milk foam to separate quickly, understanding the right techniques and conditions can make all the difference. Achieving a stable, well-textured foam is essential if you want your milk to behave the way you expect when it starts to separate. The key lies in controlling the milk texture and foam stability, both of which are influenced by your approach and the milk you use. When milk foam separates fast, it’s often because the foam wasn’t stable enough or the milk texture lacked proper consistency from the start.
Start with the milk temperature. Cold milk produces a creamier, more stable foam, but if it’s too cold, it might not foam as well. Conversely, slightly warmer milk—around 140°F to 150°F—tends to create better foam with increased foam stability. Avoid overheating, as excessive heat can break down the proteins responsible for holding the foam together. These proteins are crucial for maintaining foam texture and preventing quick separation. If the milk is too hot, the foam becomes fragile and collapses quickly, leading to separation in a short period.
Warm milk around 140°F to 150°F enhances foam stability and prevents quick separation.
Next, focus on your steaming technique. Proper aeration is vital for creating a velvety, consistent milk texture. When steaming, introduce air gradually, creating tiny bubbles that blend smoothly with the milk. A good rule of thumb is to position the steam wand just below the surface of the milk, allowing air to incorporate evenly. Once enough foam is formed, submerge the wand deeper to heat the milk evenly, avoiding large bubbles or uneven textures. A stable foam results from this careful process, which in turn enhances foam stability. When the foam is stable, it resists separation longer, giving you a richer, more uniform milk texture.
Finally, the type of milk you use plays a significant role. Whole milk generally produces richer, more stable foam because of its fat content, which helps form a more resilient structure. Plant-based alternatives or skim milk might foam easily but tend to lack the foam stability needed for long-lasting separation resistance. If you notice your foam separating quickly, it’s worth experimenting with different milk types or brands to find one that maintains a better milk texture and foam stability.
As an affiliate, we earn on qualifying purchases.
Frequently Asked Questions
Can the Type of Milk Affect Foam Separation Speed?
Yes, the type of milk affects foam separation speed. Milk with higher milk fat, like whole milk, creates creamier, more stable foam that takes longer to separate. Conversely, skim milk, processed to remove fat, produces lighter, less stable foam that separates faster. Milk processing methods also influence foam behavior; ultra-pasteurized milk often creates more stable foam, but it can separate quicker due to altered protein structures.
Does Temperature Influence How Quickly Foam Separates?
Think of milk temperature like the engine of a race car—when it’s too cold, the engine struggles; too hot, it overheats. Temperature directly influences milk viscosity and foam density. Warmer milk reduces viscosity, allowing foam to separate faster, whereas cooler milk creates denser foam that clings longer. You notice this in your morning latte: warm milk forms fluffier foam that settles quickly, while cold milk’s dense foam takes longer to separate.
Are There Specific Tools That Improve Separation Efficiency?
Using specialized tools like a fine-mesh sieve or a milk frothing pitcher with measurement marks can improve separation efficiency. These tools help you control foam consistency and guarantee even aeration. Additionally, maintaining your equipment properly—cleaning steam wands and frothing pitchers regularly—prevents residue buildup that can hinder foam quality. Proper tools combined with diligent maintenance make your foam separate more quickly and achieve a smoother, more stable texture.
How Does the Age of the Milk Impact Foam Stability?
Think of your milk as a delicate dance partner—freshness keeps the rhythm smooth. As milk ages, milk spoilage and bacterial growth weaken the proteins that stabilize foam, causing it to separate faster. You’ll notice less durable, more quickly dissipating foam with older milk. To keep your foam stable, always use fresh milk, ideally within a few days of purchase, and store it properly to minimize bacterial growth.
Is It Better to Foam Milk by Hand or With a Machine?
Using a machine is generally better for frothing milk because it provides consistent, even steam and air injection, resulting in smoother foam. Manual frothing can work well if you’re skilled, but it often requires more effort and technique to attain the same quality. Machines save you time and ensure better results, especially if you make coffee drinks frequently. So, for convenience and consistency, go for a machine’s advantages.
As an affiliate, we earn on qualifying purchases.
Conclusion
To perfect your foam, focus on finesse and patience. Fast frothing fosters faults, while gentle, gradual gestures generate gleaming, stable suds. Practice patience, prioritize proper pressure, and play with positioning. With consistent care and careful technique, you’ll create creamy, cohesive clouds that cling perfectly, avoiding separation and disappointment. Remember, mastering milk foam is a mindful mission—so slow down, stay steady, and let your skill shine through smooth, luscious layers.
espresso machine with milk frother
As an affiliate, we earn on qualifying purchases.
As an affiliate, we earn on qualifying purchases.
As an affiliate, we earn on qualifying purchases.
Flea & tick season Picks
flea and tick prevention
As an affiliate, we earn on qualifying purchases.