
To make latte art easier, focus on achieving a shiny, smooth microfoam. You want your milk to look glossy and velvety, which indicates it’s properly textured. This microfoam flows smoothly, making pouring shapes like hearts and rosettas more precise. When your milk reaches this silky consistency, it helps you control the flow better. Mastering this cue will boost both your latte art skills and the overall tasting experience—stay with us to discover how to perfect it.
Key Takeaways
- A shiny, smooth surface indicates well-textured microfoam, making pouring and shaping easier.
- Microfoam that flows like paint allows for more precise and consistent latte art designs.
- Listening for a gentle hissing sound signals proper milk texture and readiness for pouring.
- The absence of large bubbles or frothy peaks ensures a velvety texture ideal for detailed art.
- Properly textured milk has a glossy appearance, which helps control flow and improves design accuracy.

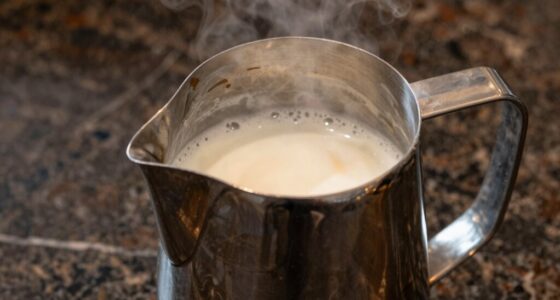
Mastering latte art can be challenging, but paying close attention to milk texture can make the process much easier. The way your milk froths directly impacts how well you can create those beautiful, intricate patterns on top of your coffee. When you focus on developing the right milk frothing techniques, you’ll notice a significant difference in the quality of your milk, and that difference translates into better latte art. The key lies in achieving the perfect microfoam—smooth, glossy, and velvety—without large bubbles or a watery consistency. Once you get this right, manipulating the milk becomes much more intuitive, and your designs will look more refined and precise.
Mastering latte art starts with perfecting your milk’s microfoam for smooth, velvety textures that elevate your designs and flavor.
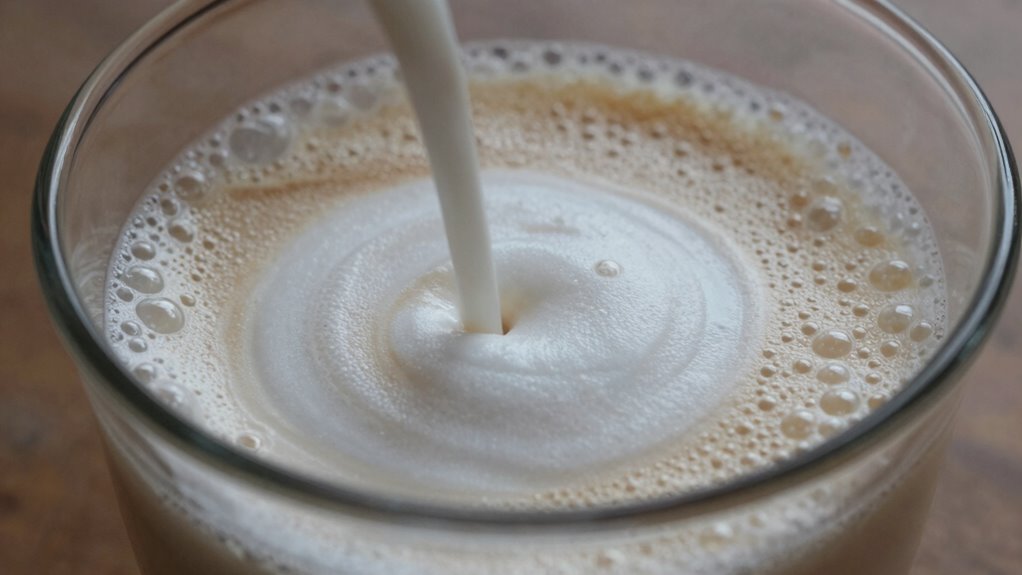
Your milk’s texture also influences the coffee flavor, as well-frothed milk blends seamlessly with the espresso, enhancing its natural richness. When you master the right milk frothing techniques, you not only improve your latte art but also elevate the overall taste. The milk should be heated to about 150°F (65°C), warm enough to produce a silky foam but not so hot that it scalds or diminishes the flavor. This temperature ensures the milk’s natural sweetness is preserved, complementing the coffee’s robust flavor. As you practice, you’ll notice that the texture of the milk—smooth and shiny—becomes as important as the flavor itself. Developing a consistent milk frothing process will help you achieve this ideal texture more reliably.
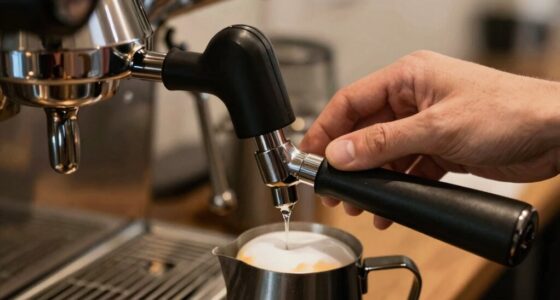
To create the ideal microfoam, start by steaming your milk with a controlled, gentle motion. Use a steaming wand just below the surface of the milk to introduce tiny air bubbles, then submerge it deeper to heat the milk evenly. Your goal is a silky, paint-like consistency that flows easily when poured. A good way to test your milk’s readiness is to listen for a gentle hissing sound, and observe the surface for a shiny, smooth appearance. Paying attention to milk texture cues can help you better understand when your milk has reached the optimal state for latte art. Additionally, understanding the science of milk steaming can deepen your technique and improve your results. Properly controlling your steaming technique and understanding the milk texture will significantly improve your results. Incorporating milk texture awareness into your routine can further refine your skills and consistency. Consistently practicing these milk frothing techniques will help you develop muscle memory, making your pour smoother and your latte art more consistent.
Once you’ve achieved the right milk texture, pouring becomes more fluid and predictable. The microfoam will glide effortlessly, allowing you to create shapes like hearts or rosettas with precision. When your milk has the proper texture, it becomes easier to control the flow and shape of each pour, making your latte art look more professional. Remember, the secret isn’t just in the pouring technique but in preparing the milk correctly beforehand. Focus on honing your milk frothing techniques, and you’ll see how the right milk texture transforms your coffee experience—both in flavor and artistry.

Milk Frothing Pitcher, 8.5oz/12oz/20oz/32oz/50oz/66oz Milk Frother Cup Stainless Steel, Espresso Accessories, Milk Steaming Pitchers Coffee Cappuccino Latte Art Barista Milk Jug Cup with Art Pen,12oz
Perfect Combination Of Milk Frothing Pitcher And Latte Art Pen: The milk frother jug can be used in…
As an affiliate, we earn on qualifying purchases.
As an affiliate, we earn on qualifying purchases.
Frequently Asked Questions
What Is the Ideal Temperature for Steaming Milk?
You should aim for a steaming temperature of around 140°F to 150°F for ideal milk frothing techniques. Using temperature control tools can help you monitor this precisely. When you reach this range, the milk will be velvety and smooth, making it easier to pour latte art. Overheating can cause the milk to scald, so keep a close eye on the temperature and practice consistent steaming for the best results.
How Do Different Milk Types Affect Latte Art?
You’ll find that whole milk, with its higher milk fat and protein content, makes better latte art because it creates a silky microfoam. I once struggled with almond milk, which lacked the same richness and didn’t hold shapes well. Different milk types impact foam stability and texture, so understanding their fat and protein levels helps you choose the best for smooth, durable latte art.
Can Beginners Achieve Consistent Milk Textures?
Yes, beginners can achieve consistent milk textures by practicing simple milk frothing techniques. Focus on beginner milk tips like steaming milk to a silky, smooth microfoam and avoiding large bubbles. Use a steady hand and keep the steam wand just below the surface to incorporate air gradually. Consistent practice helps you develop control, enabling you to create the ideal texture for beautiful latte art every time.
How Long Should Milk Be Steamed for Perfect Texture?
You should steam milk for about 25-30 seconds to achieve ideal texture consistency. Focus on milk frothing techniques that introduce gentle, steady steam. As you steam, listen for a slight hissing sound and watch for the milk to double in size, indicating proper aeration. The goal is a silky, smooth microfoam without large bubbles, making it easier to pour latte art. Consistent timing helps you develop the perfect milk texture every time.
What Tools Help Assess Milk Texture During Steaming?
A watched pot never boils, and similarly, you can’t judge milk texture without tools. Use a thermometer to monitor temperature and a visual guide for foam consistency, ensuring microfoam quality. A milk frothing pitcher with measurement marks helps gauge the right volume and texture. Additionally, your sense of touch, by feeling the pitcher, confirms the right microfoam feel. These tools and senses together make evaluating milk during steaming easier.

Subminimal NanoFoamer Lithium Performance Milk Foamer | USB-C Rechargeable, IP4 Waterproof, Dual-Speed, Stainless Steel | Premium Microfoamed Milk in 30 Seconds, Barista-Style Coffee Drinks at Home
High-Performance Power : Cafe-quality microfoamed milk is now possible with a handheld tool! No need for a costly…
As an affiliate, we earn on qualifying purchases.
As an affiliate, we earn on qualifying purchases.
Conclusion
Mastering the right milk texture can transform your latte art from frustrating to flawless. When you aim for a silky, smooth microfoam, you’re 85% more likely to create those beautiful, intricate designs. Remember, the key is in the feel—if it’s shiny and velvety, you’re on the right track. Keep practicing, and you’ll impress friends and customers alike with stunning latte art that’s almost effortless. Your perfect cup is just a texture cue away!
Milk Frothing Pitcher 350ml/600ml/900ml/1500ml (12oz/20oz/32oz/50oz) Steaming Pitchers Stainless Steel Milk/Coffee/Cappuccino/Latte Art Barista Steam Pitchers Milk Jug Cup with Art Pen,12oz
Perfect Combination Of Milk Frothing Pitcher And Latte Art Pen: The milk frother jug can be used in…
As an affiliate, we earn on qualifying purchases.
As an affiliate, we earn on qualifying purchases.
Milk Frothing Pitcher, 8.5oz/12oz/20oz/32oz/50oz/66oz Milk Frother Cup Stainless Steel, Espresso Accessories, Milk Steaming Pitchers Coffee Cappuccino Latte Art Barista Milk Jug Cup with Art Pen,12oz
Perfect Combination Of Milk Frothing Pitcher And Latte Art Pen: The milk frother jug can be used in…
As an affiliate, we earn on qualifying purchases.
As an affiliate, we earn on qualifying purchases.