
If your grinder stalls or makes strange noises, turn it off and unplug it before inspecting for jams. Remove loose debris and carefully disassemble to access the blockage. Use household items like vegetable oil or vinegar to loosen stuck material, but avoid water and harsh chemicals. Mechanical tools like screwdrivers or pliers can help if the jam is stubborn. Following these steps will help you clear the jam safely—stay tuned to learn more tips to prevent future stalls.
Key Takeaways
- Unplug the grinder immediately and visually inspect for obvious jams or debris before attempting removal.
- Use appropriate tools like screwdrivers or pliers to carefully disassemble components, following safety precautions.
- Clear stuck materials with brushes or cloths, avoiding forcing parts to prevent damage.
- Reassemble components correctly, ensuring proper alignment, then test the grinder gently to confirm clearance.
- Always wear safety gear, work in a clean area, and avoid water or harsh chemicals during cleaning and troubleshooting.

Takavu Coffee Grinder Cleaning Kit – 5pcs Boar Bristle Grinder Brush, Detail Scrub Brush, Steam Wand Brushes & Microfiber Towel for Espresso Machine Coffee Maker Pour Over
Cleaner Coffee Gear, Fresher Brews: Regular maintenance is essential for great-tasting coffee. This 5-piece coffee machine cleaning kit…
As an affiliate, we earn on qualifying purchases.
As an affiliate, we earn on qualifying purchases.
Recognize the Signs of a Grinder Jam
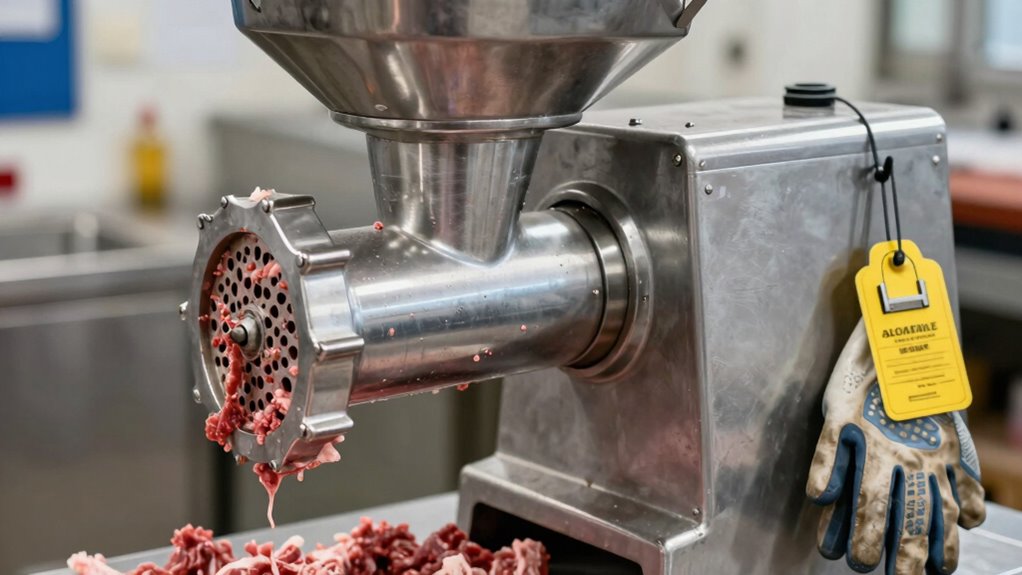
A grinder jam can happen unexpectedly, and recognizing the signs early can save you time and frustration. Pay attention to unusual sounds, like grinding or squealing, which often indicate a blockage. If you notice the motor slowing down or feeling excessive heat, it’s a clear sign that something’s off. A sudden lack of output or inconsistent grinding also signals a potential jam. Regular grinder maintenance helps prevent these issues, but when they occur, troubleshooting tips like stopping the machine immediately and inspecting the burrs or blades are essential. Additionally, understanding the types of jams common in grinders can help you diagnose the problem more effectively. Recognizing the signs of a jam early allows for quicker action and minimizes the risk of damage to your equipment. By staying alert to these signs, you can act quickly, identify the problem, and avoid further damage. Recognizing a jam early is key to effective troubleshooting and keeping your grinder running smoothly. Being familiar with preventative maintenance can also reduce the likelihood of future jams.
Detail Cleaning Brush for Tight Spaces | 6-Pack Tough Nylon Bristle for Coffee Grinder & Keyboard | Multi-Purpose Dusting Tool for Electronics, Shavers, & Small Appliances
⭐ Shed-Free Performance – Firmly anchored nylon bristles stay put while you clean grinders, shavers, keyboards, and electronics…
As an affiliate, we earn on qualifying purchases.
As an affiliate, we earn on qualifying purchases.
Why Do Grinder Jams Happen? Causes of Sticky Material
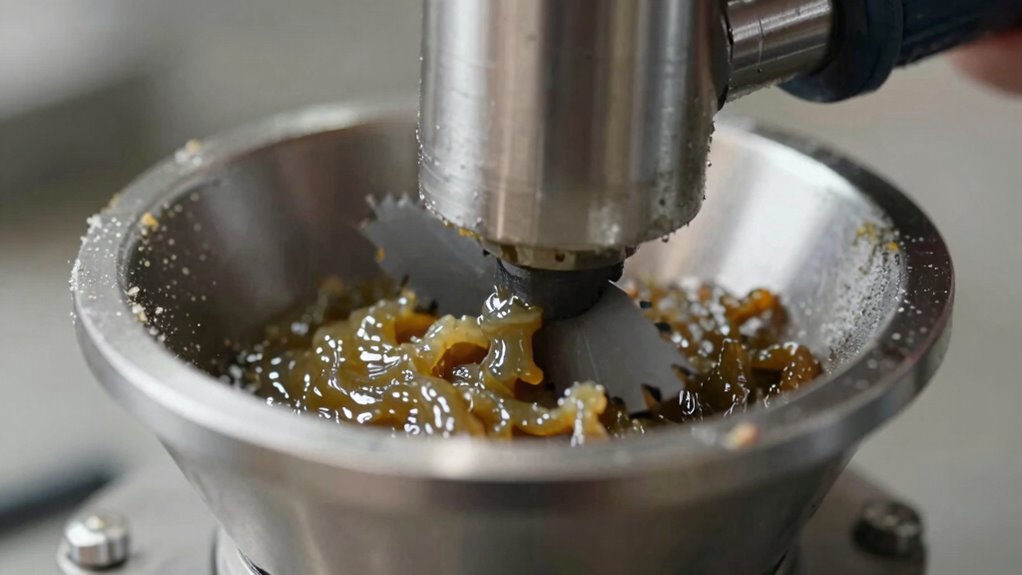
Grinder jams often occur when sticky or clumping materials clog the grinding mechanisms, making it difficult for the blades or burrs to operate smoothly. This usually results from poor grinder maintenance or excessive material buildup inside the chamber. When you don’t regularly clean your grinder, residue and fine particles can accumulate, creating a sticky environment that causes the material to cling and stick. Over time, this buildup hampers the movement of the blades or burrs, leading to jams. Using damp or oily materials can also contribute to this issue, as they tend to stick more easily. To prevent frequent jams, it’s essential to keep your grinder clean and well-maintained, ensuring that leftover material doesn’t build up and cause blockages. Additionally, implementing energy-efficient cleaning techniques can help maintain optimal performance while reducing energy consumption. Incorporating proper natural cleaning methods can further help in reducing residue buildup without the need for harsh chemicals. Regular inspection of the grinding parts and understanding grinder mechanics can also help identify early signs of jams before they occur. Being familiar with common causes of sticky material can assist in selecting appropriate cleaning and maintenance routines.

Bunn 05861.1002 Burr Set Kit New, Stainless
Genuine OEM replacement part
As an affiliate, we earn on qualifying purchases.
As an affiliate, we earn on qualifying purchases.
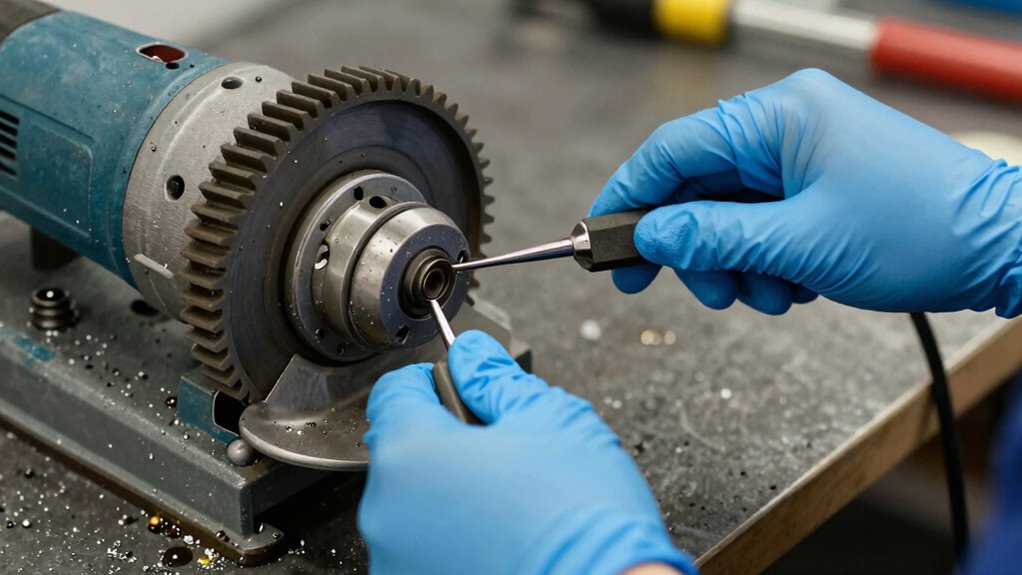
Prepare Your Workspace and Gather Safe Tools
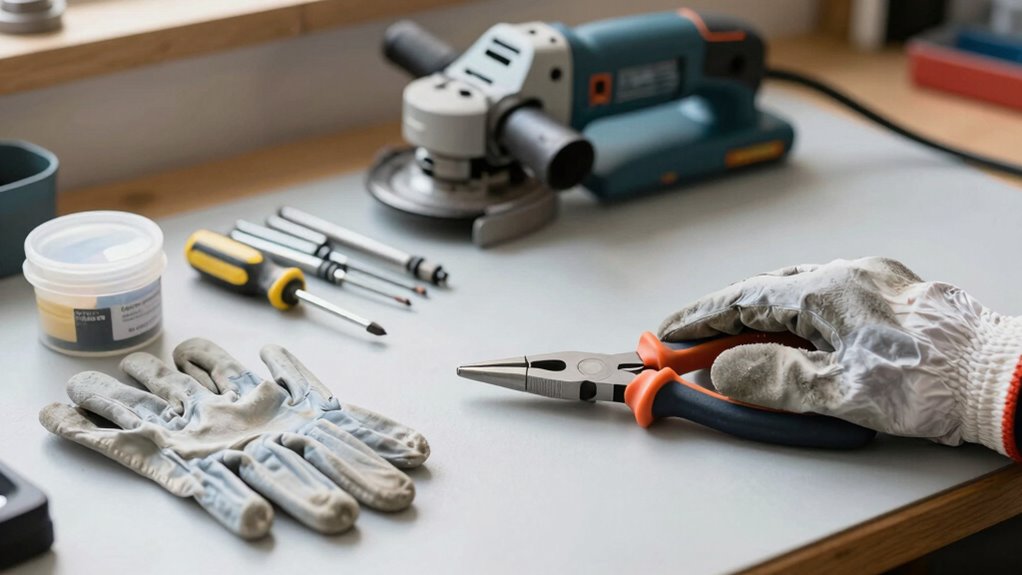
Before you start, make sure you have the right safety gear to protect yourself. Gather all necessary tools so you won’t have to search for them later. Also, clear your workspace to create a safe, efficient environment for working on your grinder. Ensuring your workspace is free of unnecessary clutter helps prevent accidents and facilitates better focus on safety protocols. Incorporating calm, practical home spa design can further enhance your safety measures during maintenance.
Choose Proper Safety Gear
Equipping yourself with the right safety gear is crucial before starting any grinding project. Personal protective equipment (PPE) helps protect you from sparks, debris, and accidental contact with moving parts. Always wear safety goggles or a face shield to guard your eyes and face. Use sturdy gloves to prevent burns and cuts, but make sure they don’t interfere with your grip or control. Hearing protection, like earplugs or muffs, is essential to prevent hearing damage from loud grinding noises. Wear long sleeves and pants to shield your skin from sparks and hot particles. Following proper safety precautions, such as inspecting your gear before use, ensures you stay protected throughout the process. Staying vigilant about safety gear minimizes risks and keeps you safe during the job. Additionally, understanding safe handling techniques can further reduce potential hazards during grinding, especially when managing power tools or working in confined spaces.
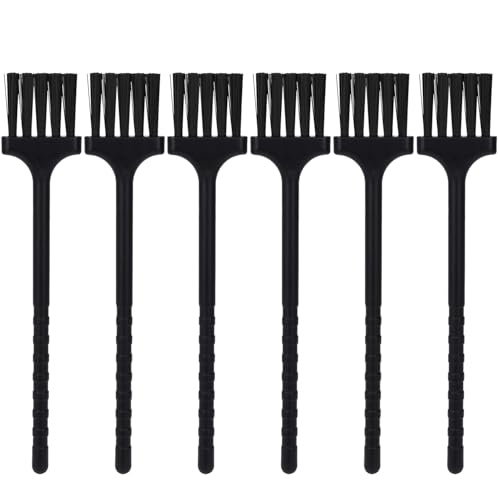
Gather Necessary Tools
Start by gathering all the tools you’ll need for the grinding project to guarantee a smooth workflow. Ensure you have the right safety precautions in place, like gloves and eye protection, before handling any tools. You’ll need basic items such as screwdrivers, pliers, and a wrench to disassemble parts if necessary. Don’t forget to include tools specific to grinder maintenance, like a cleaning brush or lubricant, to keep your equipment in good shape. Having everything ready prevents delays and reduces the risk of accidents. Check that your tools are in good condition and appropriate for your task. Properly gathering and organizing your tools sets a safe foundation, making it easier to troubleshoot and clear the jam efficiently. Additionally, understanding kitchen tool safety helps you prevent common mistakes and enhances your overall safety during maintenance. Being familiar with tool handling best practices ensures you use your tools effectively and avoid mishaps. Remember that feature Buddies can provide useful tips on proper tool use and safety procedures to further support your project. For example, reviewing safety guidelines relevant to your specific tools can further reduce potential hazards during the process. Also, paying attention to user feedback can help identify common issues and effective solutions for grinder maintenance.
Clear Workspace Area
Creating a clean, organized workspace is essential for safely and efficiently clearing a grinder jam. Start by removing clutter and ensuring your area is well-lit to prevent accidents. Gather all necessary tools, such as screwdrivers and brushes, and lay them out within easy reach. Follow safety precautions by wearing gloves and eye protection to avoid injury from sharp parts or debris. Keeping your workspace tidy reduces the risk of losing small components and helps you stay focused. Incorporate maintenance tips by inspecting your tools for damage before use. A clear, safe environment not only protects you but also speeds up the process. Additionally, being familiar with navigation and mapping can help you locate hidden or hard-to-reach areas within your workspace, making the process more efficient. Remember that a well-maintained workspace supports safe operation and reduces the likelihood of future jams or accidents. Regularly reviewing tool safety procedures ensures you stay prepared for unexpected situations.

Grace USA Original Gun Care Screwdriver Set, Tools & Accessories for Gunsmithing & Woodworking, 8 Piece Set, Made in USA
PRECISION FOR THE PERFECT FIT EVERY TIME: Each gun care screwdriver is custom hollow ground to fit scope…
As an affiliate, we earn on qualifying purchases.
As an affiliate, we earn on qualifying purchases.
Step-by-Step Guide to Clear a Grinder Jam Safely

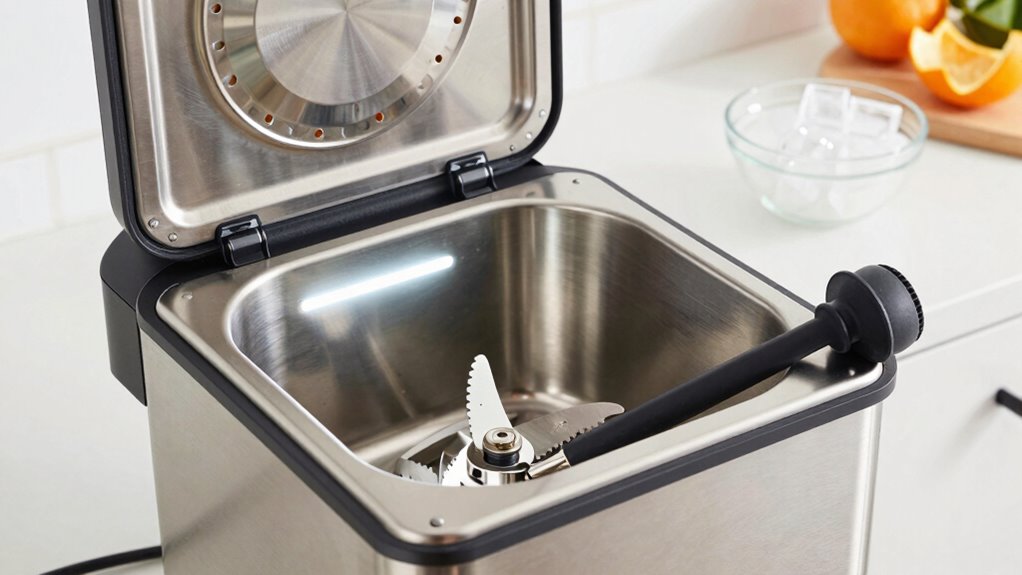
When your grinder gets jammed, it can be frustrating, but clearing the blockage safely is essential to avoid damage or injury. Start by unplugging the device and removing any loose debris. Check your maintenance routines regularly, ensuring the grinder is clean and properly lubricated to prevent future jams. Next, carefully disassemble the grinder following the manufacturer’s instructions. Use a brush or cloth to clear stuck particles. Avoid forcing parts apart, as this could cause damage. Once cleared, reassemble the grinder, ensuring all parts are correctly aligned.
| Step | Action |
|---|---|
| 1 | Unplug and inspect for visible jams |
| 2 | Disassemble and clear debris carefully |
| 3 | Reassemble and test the grinder after lubrication |
Regular maintenance helps prevent jams and keeps your grinder running smoothly.
Household Items You Can Use to Loosen Sticky Residue

You probably have some household items in your kitchen that can help loosen sticky residue from your grinder. Common kitchen staples like vinegar or cooking oil often work well, but it’s important to know which household alternatives are effective and safe. Be cautious with certain items, like harsh chemicals, that could damage your grinder or pose health risks.
Common Kitchen Items
Household kitchen items can be surprisingly effective for loosening sticky residue. When dealing with grinder jams, these items help smooth motor maintenance and improve grinder lubrication. Here are four common kitchen items you can try:
- Vegetable oil – Loosens sticky buildup and helps lubricate moving parts.
- White vinegar – Breaks down residue without damaging components.
- Lemon juice – Natural degreaser that cuts through stubborn grime.
- Baking soda paste – Mild abrasive to scrub away residue safely.
Using these items can ease cleaning and ensure your grinder functions smoothly. Just apply thoughtfully to avoid affecting motor maintenance, and follow up with proper lubrication to prevent future jams.
Effective Household Alternatives
Looking for effective household alternatives to loosen sticky residue in your grinder? You can try common items like vegetable oil, baking soda, or vinegar for grinder maintenance. These natural options help break down stubborn buildup safely. Use a small amount of oil on a cloth to lubricate and loosen residue. Baking soda sprinkled inside, followed by a bit of vinegar, creates fizz that can loosen sticky particles. Always follow safety precautions: unplug your grinder, avoid soaking electrical parts, and use minimal liquids. Here’s a visual guide:
| Item | Purpose | Safety Tip |
|---|---|---|
| Vegetable Oil | Loosens sticky residue | Use sparingly, wipe excess |
| Baking Soda | Abrasive cleaner, deodorizer | Avoid inhaling dust |
| Vinegar | Dissolves mineral buildup | Rinse thoroughly afterward |
| Soft Cloth | Applies and cleans | Keep dry and clean |
Items to Avoid
While it might seem tempting to use common household items to loosen sticky residue in your grinder, some can cause more harm than good. These substances may damage parts, compromise safety precautions, or hinder equipment maintenance. Avoid these items:
- Water – It can cause rust and electrical issues.
- Alcohol-based cleaners – These may degrade plastic components.
- Cooking oils – They can become sticky and attract more residue.
- Vinegar – Its acidity might corrode metal parts over time.
Using the wrong items risks damaging your grinder and voiding warranties. Always prioritize safety precautions and proper equipment maintenance. Stick to recommended cleaning methods to guarantee your grinder stays in excellent condition and functions smoothly. Avoiding these household items helps prevent costly repairs and extends the lifespan of your appliance.
When to Use Mechanical Tools and When to Avoid Them

Mechanical tools are invaluable when you need to complete tasks efficiently and with precision, but they’re not always the best choice. Use mechanical tools when the jam is stubborn and manual methods haven’t worked, but always consider safety considerations first. If the grinder is overheating or the jam involves tangled or damaged parts, mechanical tools can help loosen or remove debris quickly. However, avoid using them if there’s a risk of damaging the grinder or causing injury. If you’re unsure about the condition of internal components, it’s safer to consult a professional. Always wear protective gear and follow manufacturer instructions when employing mechanical tools. Remember, using the right tool in the right situation prevents further damage and keeps you safe.
Tips to Prevent Future Grinder Jams
Preventing future grinder jams starts with proper maintenance and careful operation. Regularly following maintenance routines helps keep your grinder functioning smoothly. Understanding your grinder’s design allows you to operate it correctly and avoid common pitfalls. To minimize jams, consider these tips:
- Clean your grinder thoroughly after each use to prevent buildup.
- Avoid overloading the hopper, which can strain the motor.
- Use the correct grind size suited for your brewing method.
- Check for wear and tear on grinder parts regularly and replace them promptly.
When a Jam Persists: Seek Professional Help
If a grinder jam persists despite your troubleshooting efforts, it’s best to consult professional assistance. Continuing to force the machine can cause damage or pose safety risks. Contact a qualified technician or authorized service provider to evaluate the issue safely. In some cases, you might need emergency services, especially if there’s smoke, sparks, or strange noises. Recognizing when to seek help prevents further harm and ensures proper repairs.
| Situation | Recommended Action |
|---|---|
| Persistent jam | Call a professional technician |
| Signs of electrical issues | Contact emergency services immediately |
| Unusual noises | Shut off and seek expert help |
| Visible damage | Avoid DIY repairs, consult specialists |
| Safety concerns | Prioritize professional assistance |
Frequently Asked Questions
Can Grinder Jams Cause Permanent Damage to the Appliance?
Yes, grinder jams can cause permanent damage to your appliance if not addressed promptly. Repeated jams may strain components, reducing appliance longevity and increasing repair costs. When you ignore jams or try to force the appliance, you risk damaging internal parts, leading to costly repairs or early replacement. To avoid this, clear jams safely and regularly maintain your grinder, ensuring it functions smoothly and lasts longer.
Are There Specific Safety Gear Recommendations During Jam Removal?
Protective gear safeguards your person during jam removal, preventing potential injuries. Safety precautions include wearing gloves to guard against sharp blades and goggles to shield your eyes from debris. You might also consider a dust mask if there’s dust or small particles. Always prioritize protective gear to make certain you’re safe and secure while addressing grinder jams. Proper safety precautions make the process safer, smoother, and more secure for you.
How Often Should I Check My Grinder to Prevent Jams?
You should check your grinder daily as part of your maintenance schedule to prevent jams. Regular inspections help identify potential issues early. Follow troubleshooting tips like clearing obstructions promptly and ensuring proper feed rates. By staying proactive, you’ll reduce the chances of jams and keep your grinder running smoothly. Consistent checks and quick responses are key to maintaining ideal performance and avoiding costly downtime.
What Are the Environmental Impacts of Using Household Items for Cleaning?
Using household items for cleaning can have environmental impacts, especially if you don’t choose biodegradable cleaning options. Non-biodegradable products may contribute to chemical runoff, polluting waterways and harming wildlife. By opting for biodegradable cleaning supplies, you mitigate this risk and help protect the environment. Always read labels to ensure your cleaning methods are eco-friendly, and avoid harsh chemicals that can cause long-term environmental damage.
Is It Safe to Disassemble a Grinder for Jam Removal Without Professional Help?
If you disassemble a grinder for jam removal without professional help, you risk damaging the appliance and voiding your warranty. For example, a homeowner attempting DIY safety found their warranty rejected after improper disassembly caused more damage. It’s best to follow manufacturer guidelines or consult a professional. This way, you safeguard your investment and ensure safe jam removal, rather than risking injury or costly repairs.
Conclusion
Now that you know how to recognize and clear a grinder jam safely, you’re better equipped to handle sticky situations. Remember, it’s better to stay safe than sorry—don’t push your luck or rush the process. With patience and the right tools, you can keep your grinder running smoothly. When in doubt, don’t bite off more than you can chew—seek professional help to avoid making a mountain out of a molehill.